If you do not have the slide rail please contact us for a free upgrade kit
Removal: Step 1
Fully extend the banner and lock into place.
Removal: Step 2
With the pole hole of the banner stand away from you, gently remove the chrome end covers on both sides of the banner stand. The covers are attached with magnets and should snap off. Open lid. Remove the retention pin from left end cover. (fig. A)

Removal: Step 3
You will need two people to complete this task, one person to adjust the banner height and one person to engage the pin.
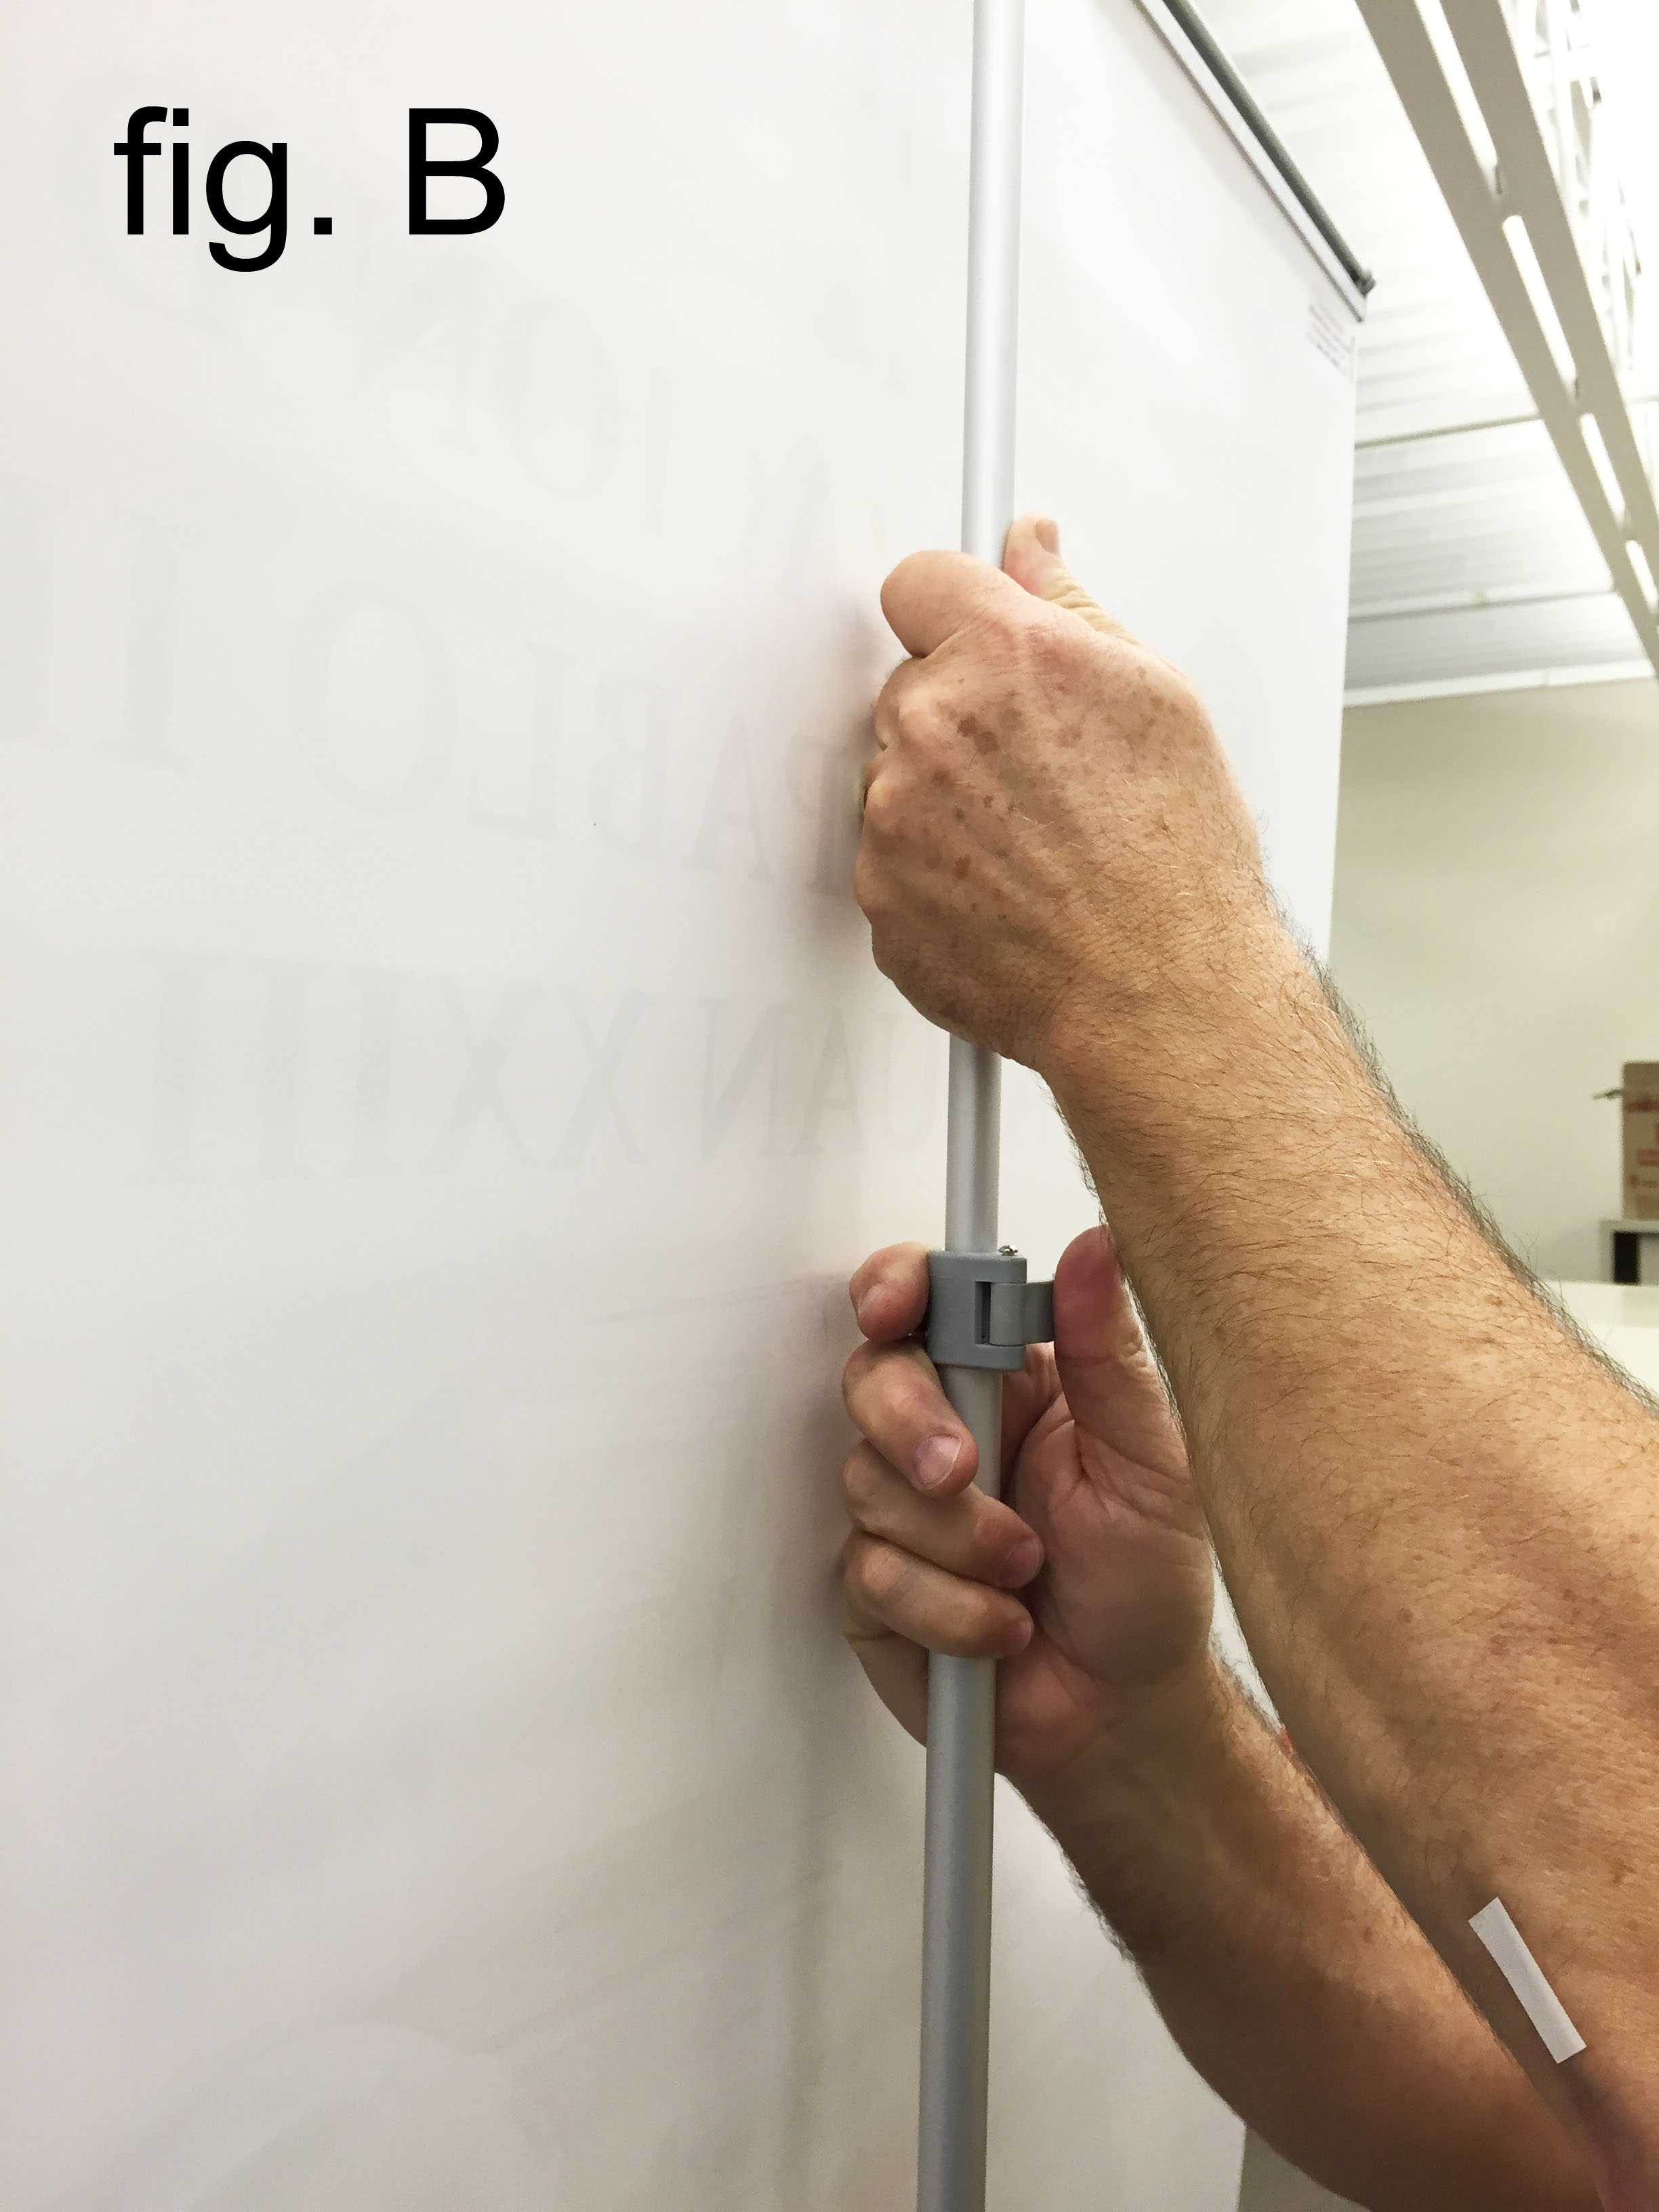
Person 1: Unlock and lower the telescoping pole allowing the banner to retract slowly. (fig. B)
Person 2: Hold the pin in hand. Allow the banner to retract less than 1 revolution at the same time pressing in the pin until it is fully inserted into the large hole on the left of the banner stand. (fig. C)
Be sure that the pin goes through the hole the in roller also. The roller should be aligned with the cutaway slot to allow the banner to slide out freely.
Removal: Step 4
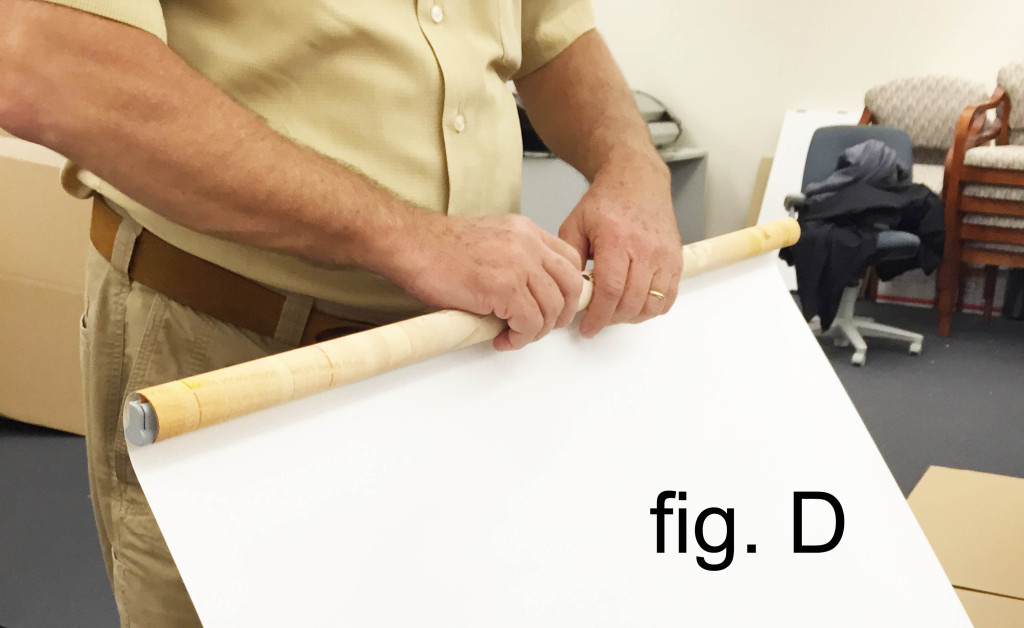
Begin to roll up the banner around the top rail. Be sure to start rolling from the top. This will make it easier to reinstall the banner at a later date. (fig. D)
Removal: Step 5
When you have reached the bottom of the banner, slide the bottom rail out through the cutaway side panel (fig. E) and off the roller. Slide the banner to the right to remove from the stand. (fig. F)


Installation: Step 1
Remove the new banner from the shipping tube (save the tube for old banner storage). Remove the packing sleeve and rubber band and unroll about 1 foot of the bottom of the new banner. (fig. G)

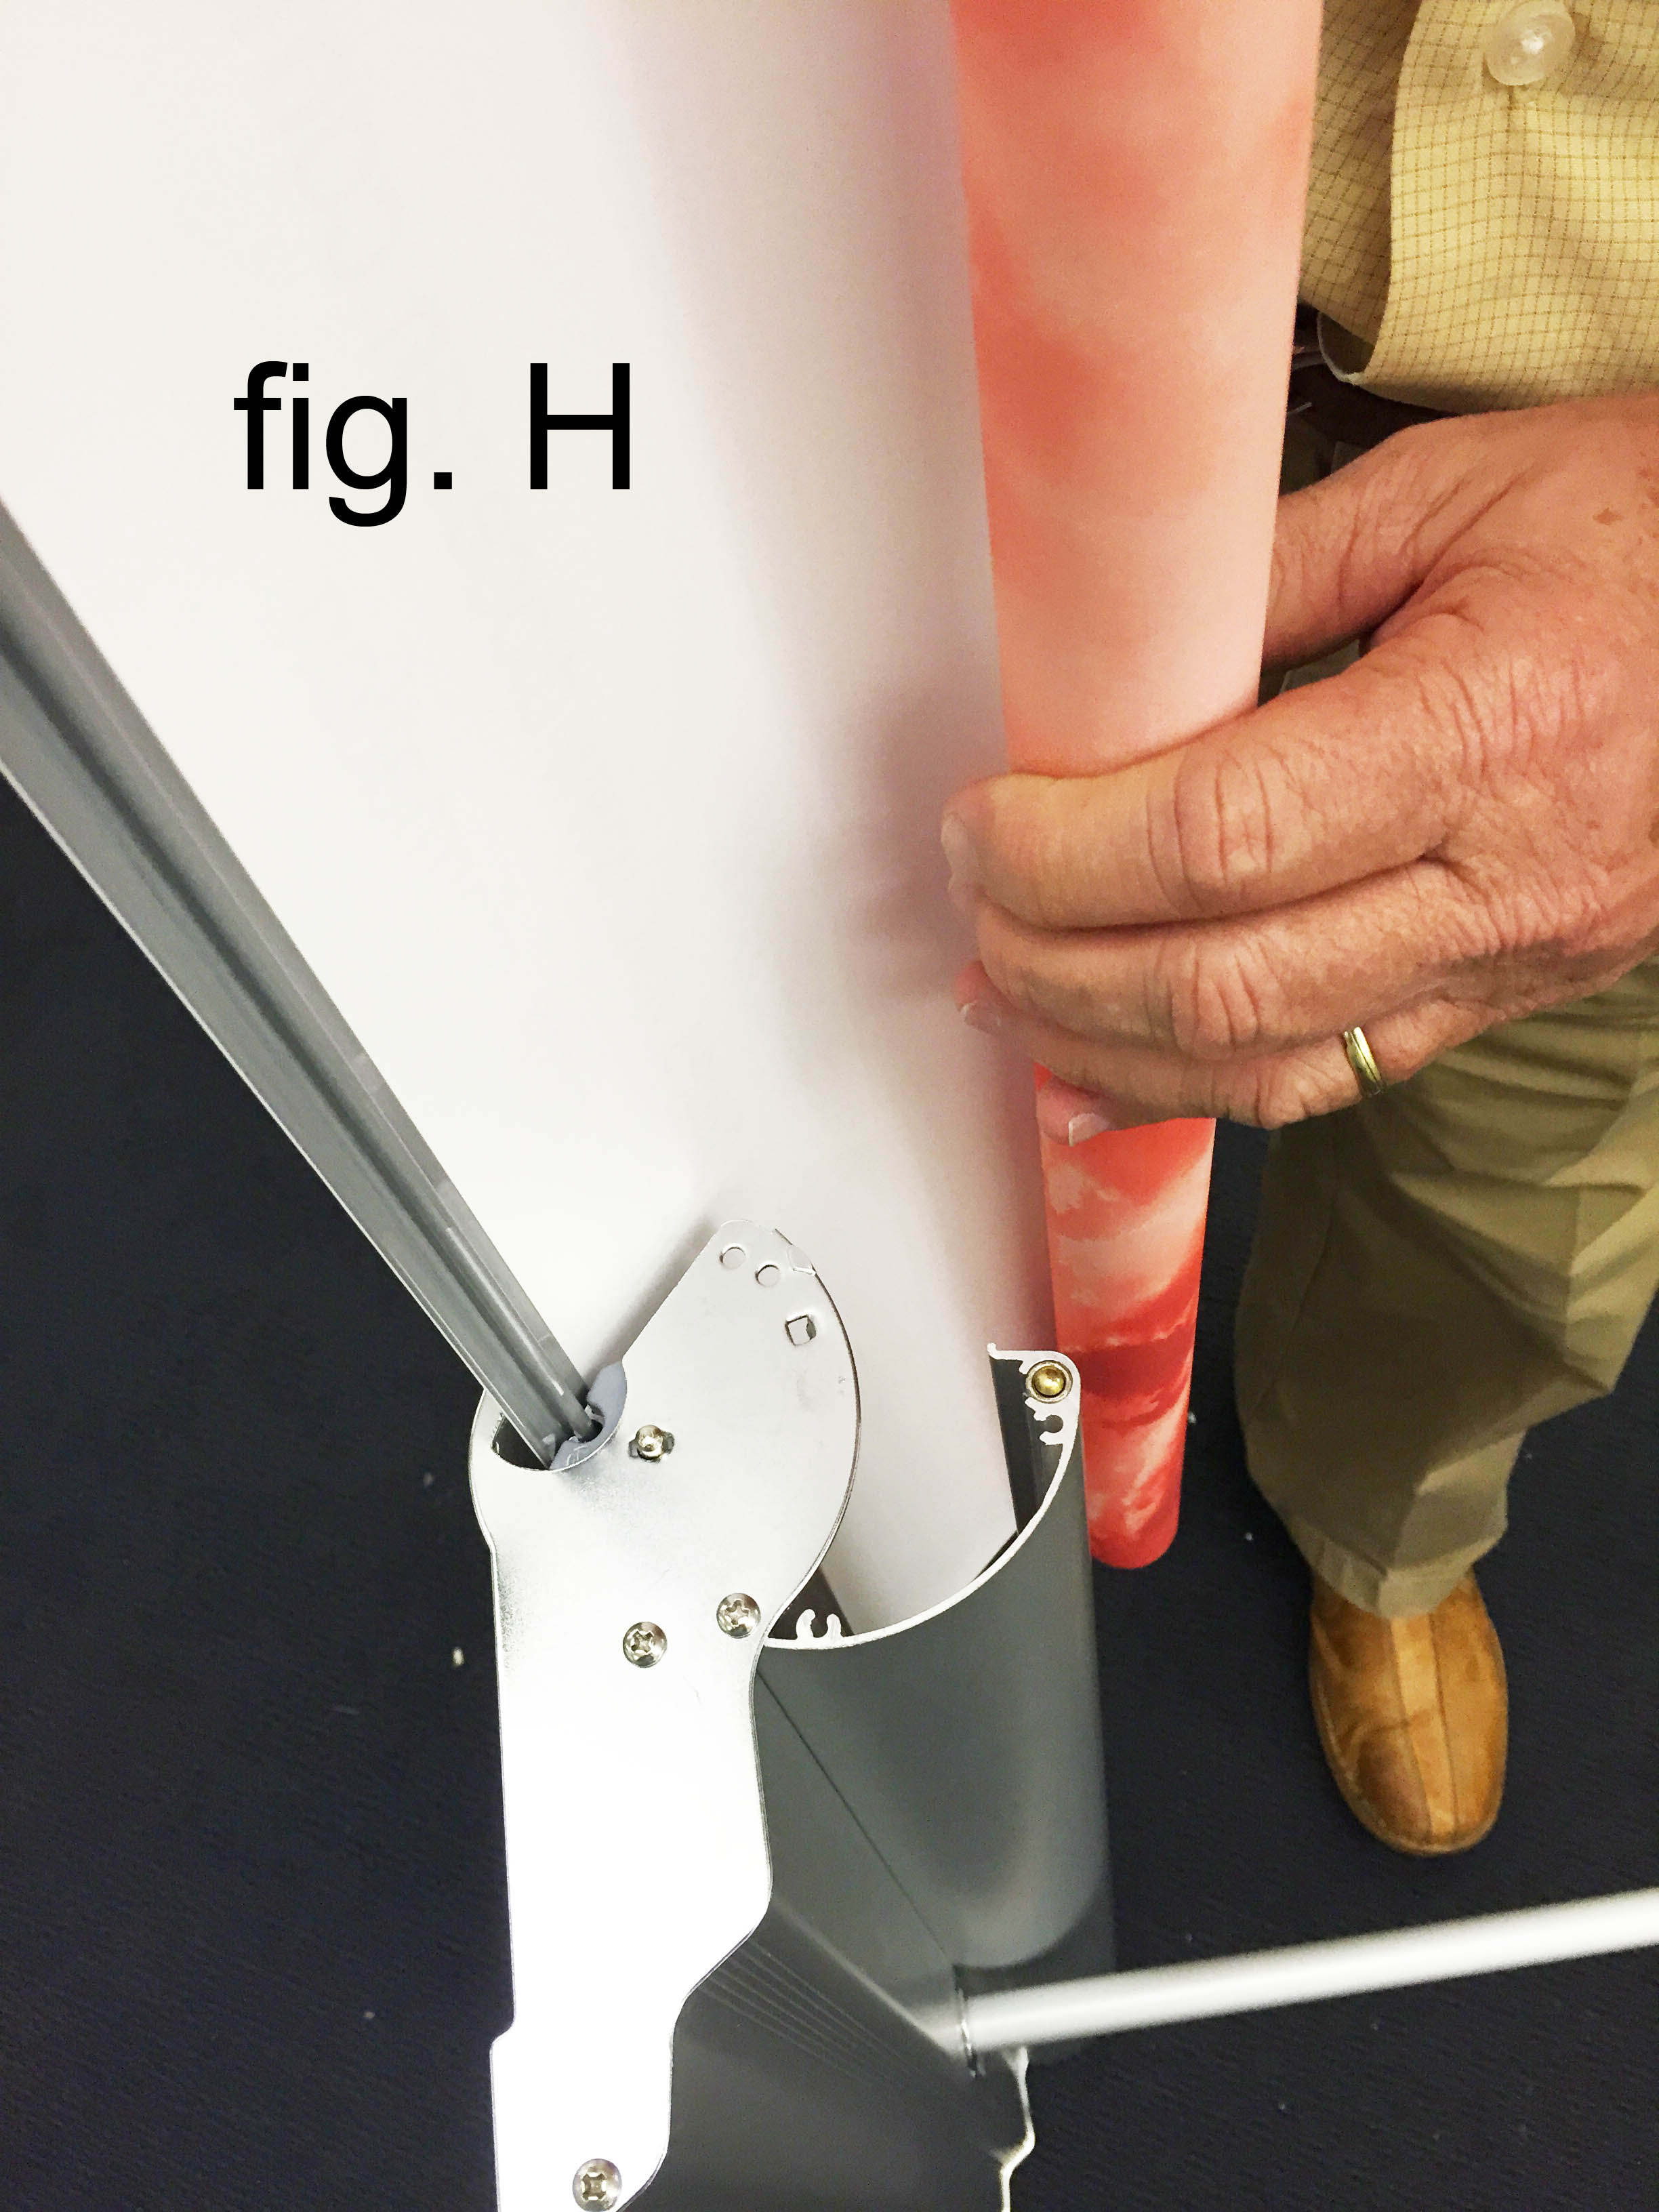
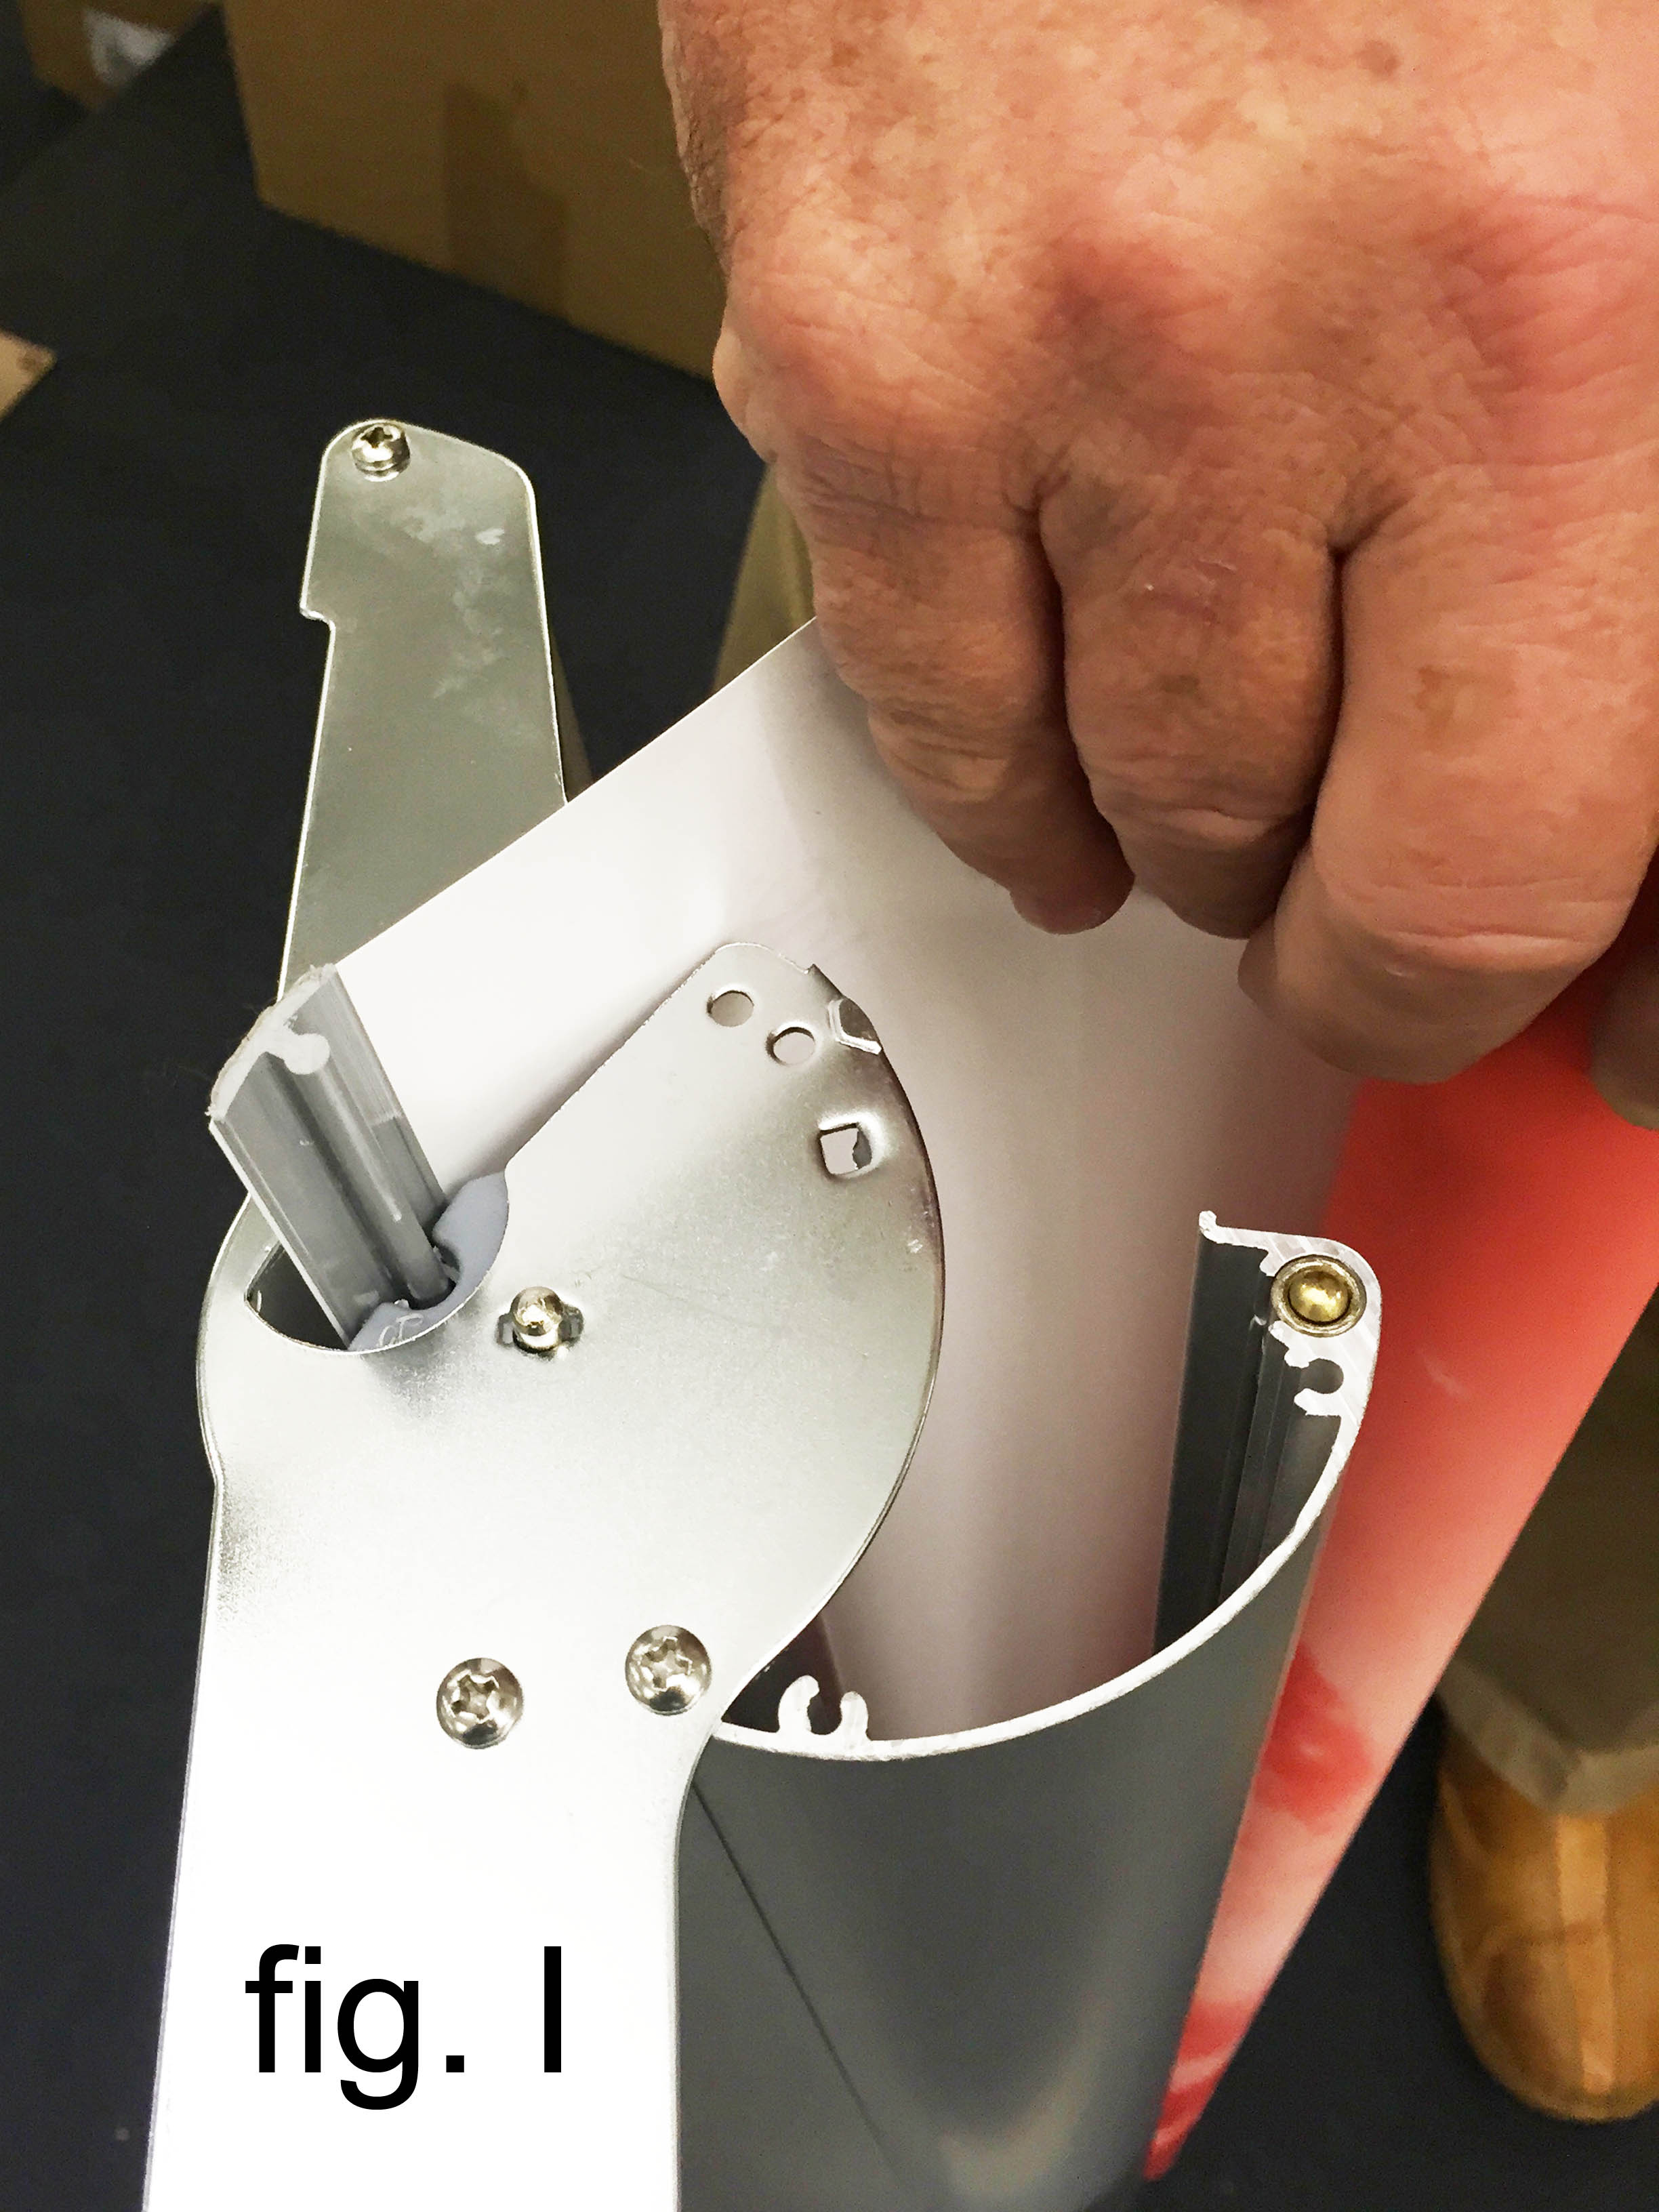
Installation: Step 2
Slide the bottom rail through the cutaway side panel onto the roller groove. It may be easier turning the stand vertical with the left side (pin side) down, on the floor. (figs. H,I) Images depict the banner stand turned vertically.
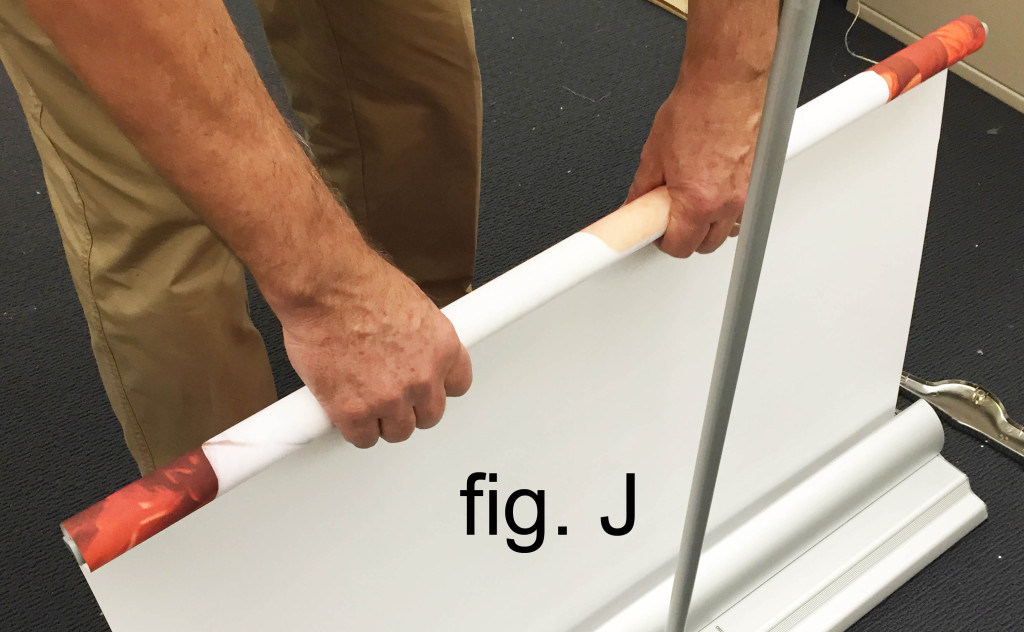
Installation: Step 3
After the banner is fully inserted, return the stand to a flat position on the floor. With the bottom rail secure in the roller, unroll the new banner upwards. (fig. J)
Installation: Step 4
Once the banner is fully unrolled and the top rail is exposed, pull up the banner and clip the top rail (orange sticker indicating ‘Insert’) onto the flat portion of the top cap. Release the clamp on the pole. Pull up on the upper section of the pole and top rail. Extend the upper section until the bottom of the banner image area is exposed. Close the clamp to lock the telescoping pole into place. (fig. K)

Installation: Step 5
Extend the pole to remove any slack in the banner and lock. (fig. L)
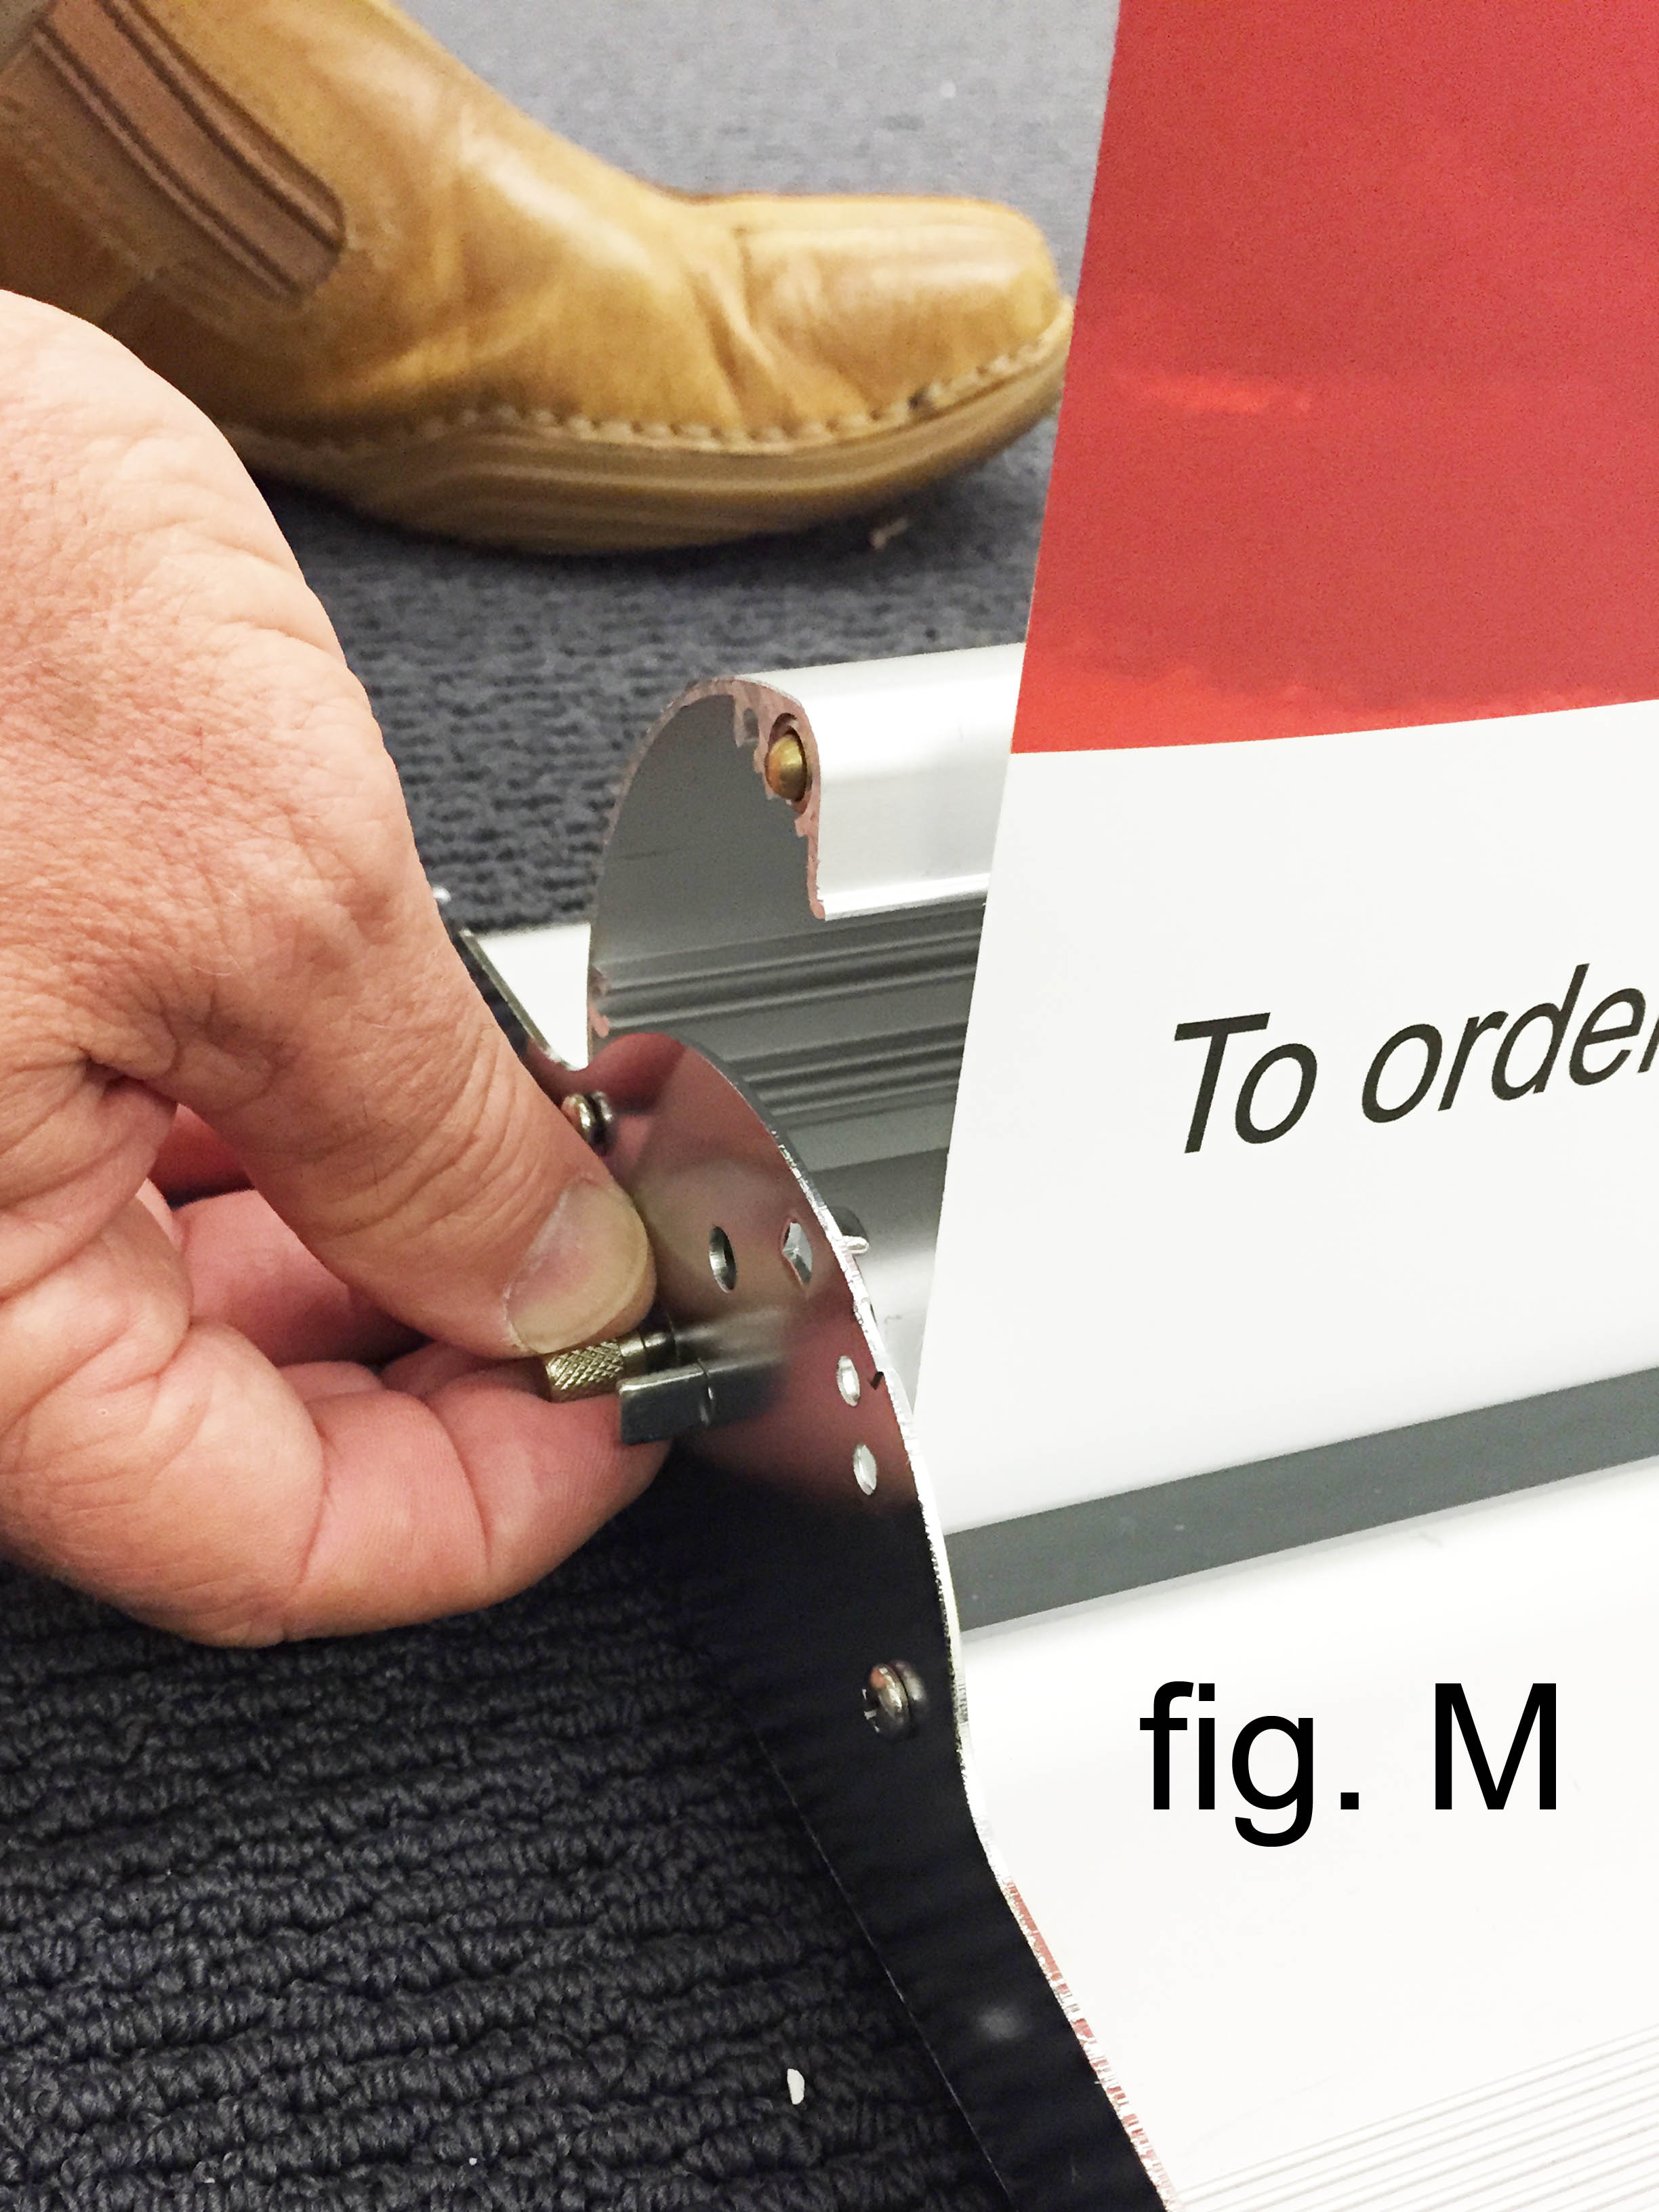
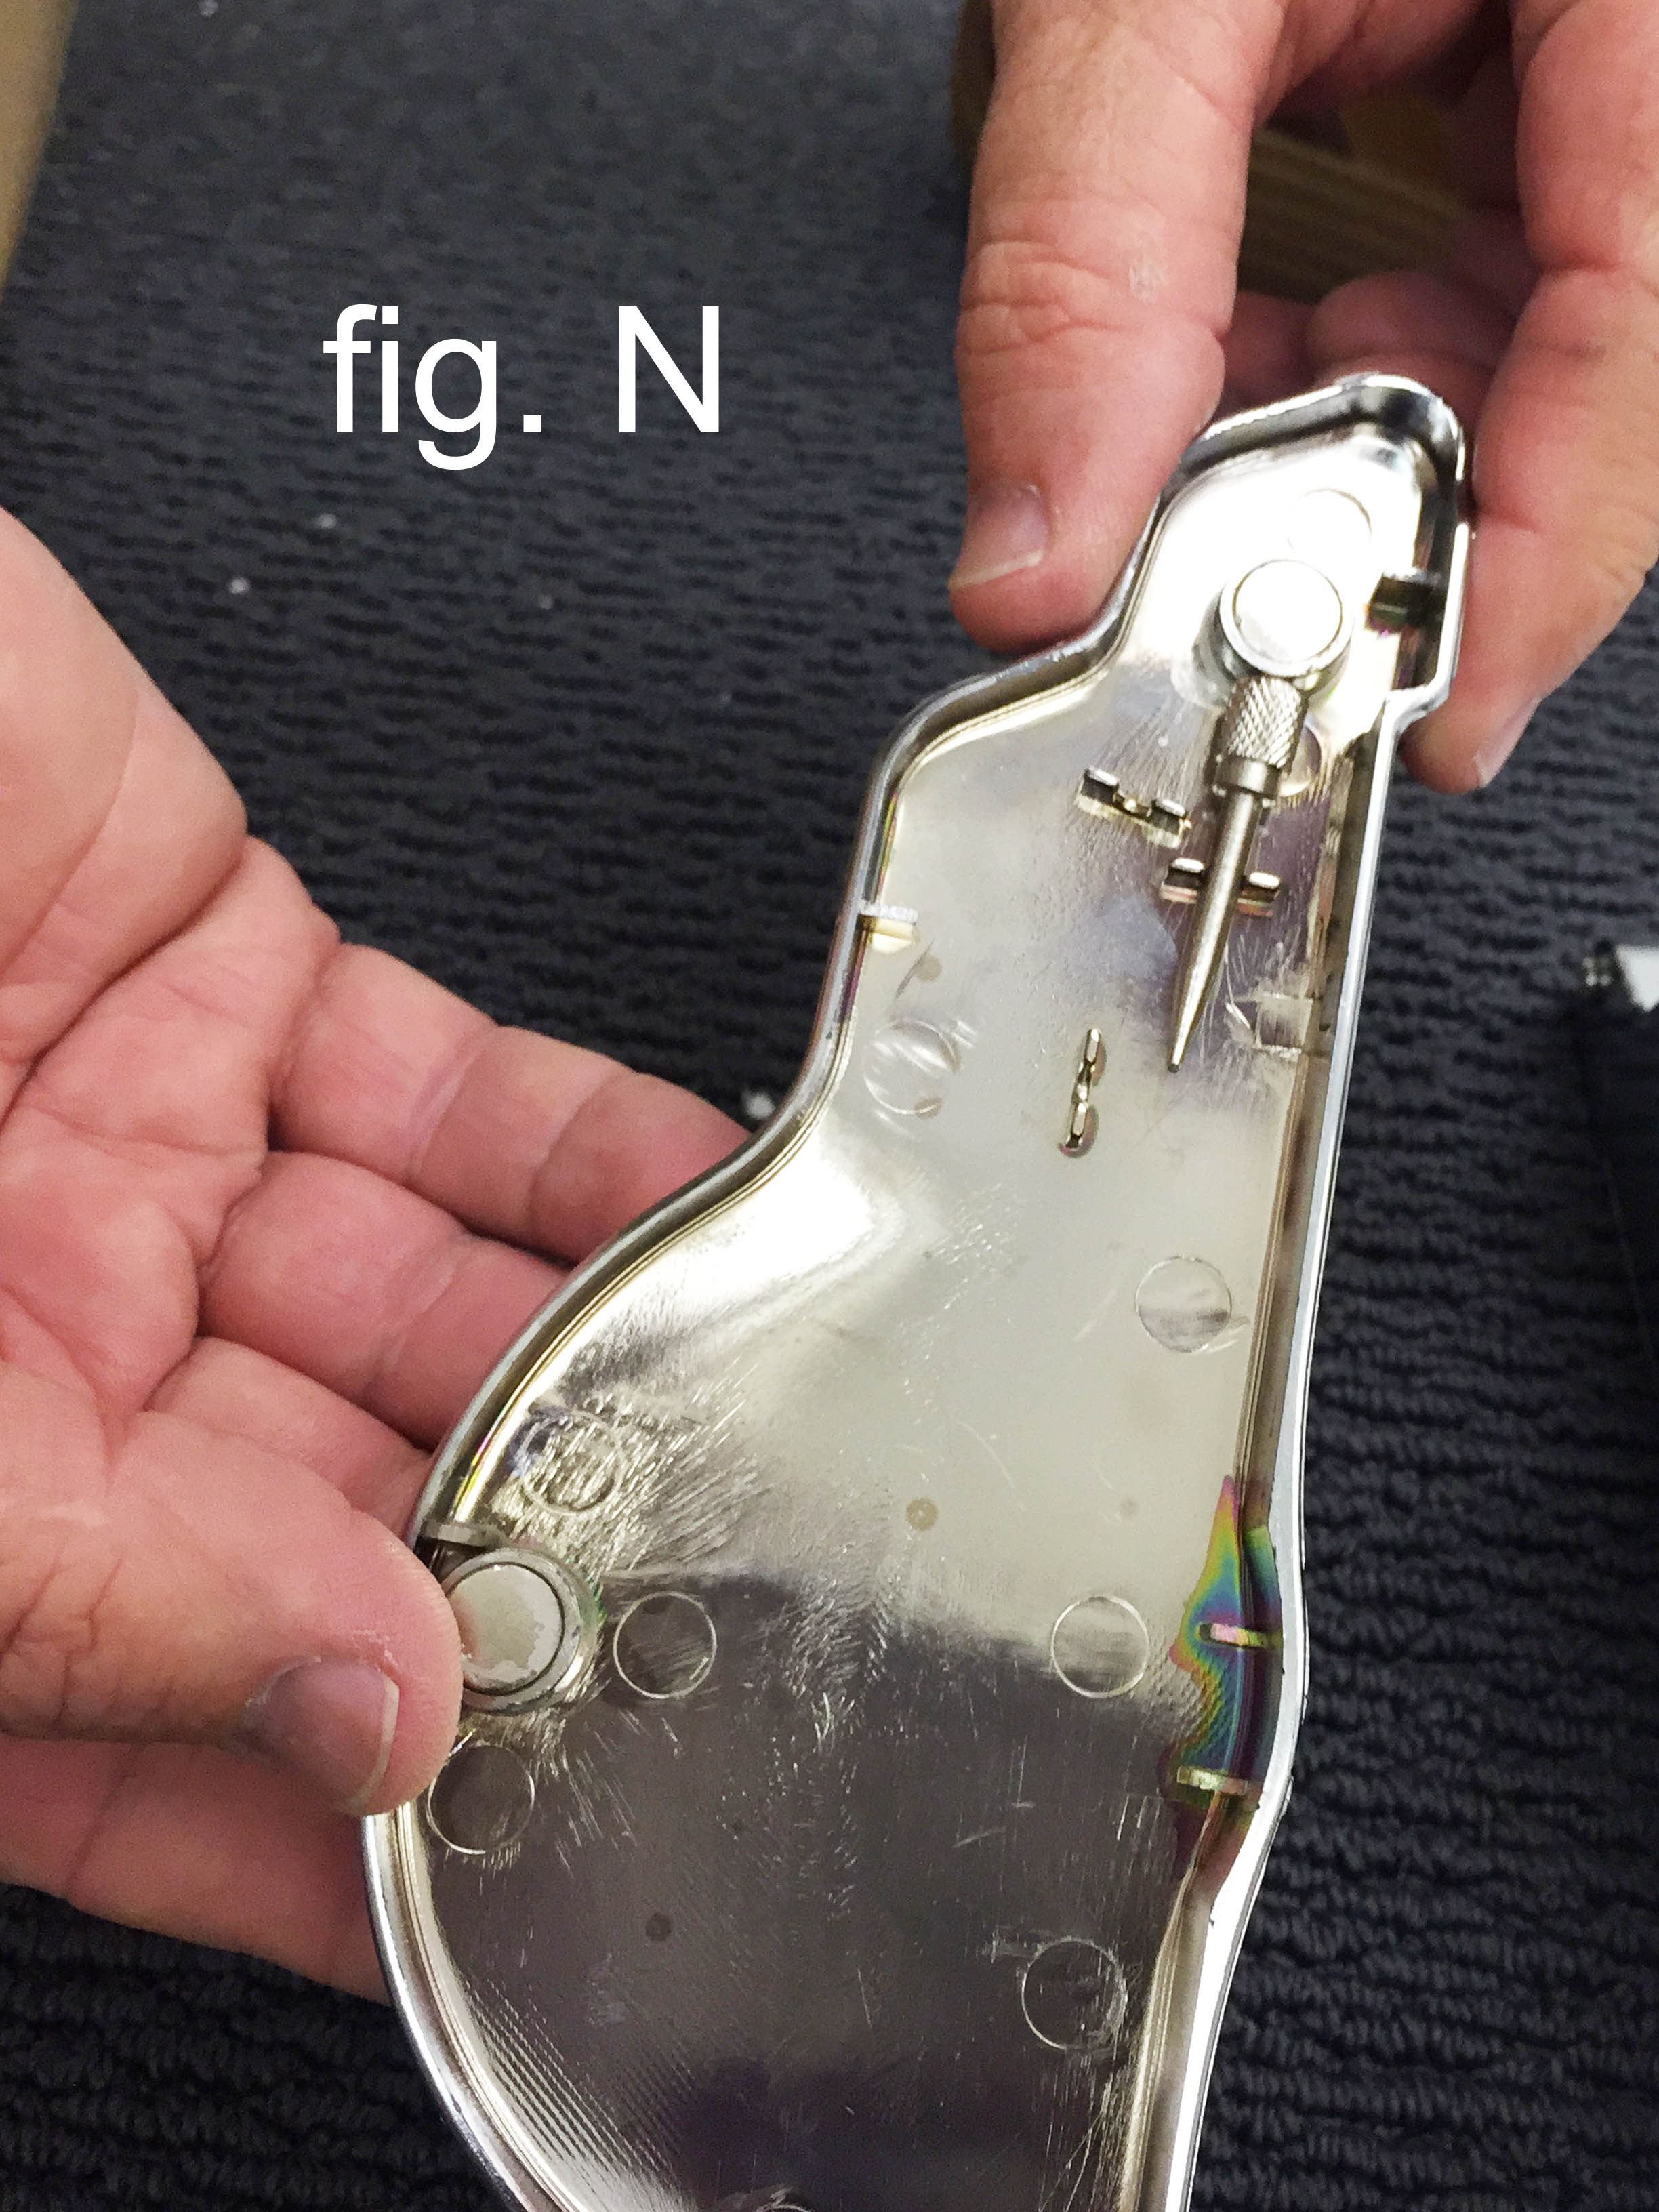
Remove the pin. (fig. M) Store it in the pin cradle in the chrome endcap. (fig. N)
Replace the chrome endcaps and your new banner is ready for display. Place the old banner the in shipping tube and store.