Reports Walk Through
Here is the link to the reports video referenced in this walk through https://vimeo.com/451816544/fedd2366eb
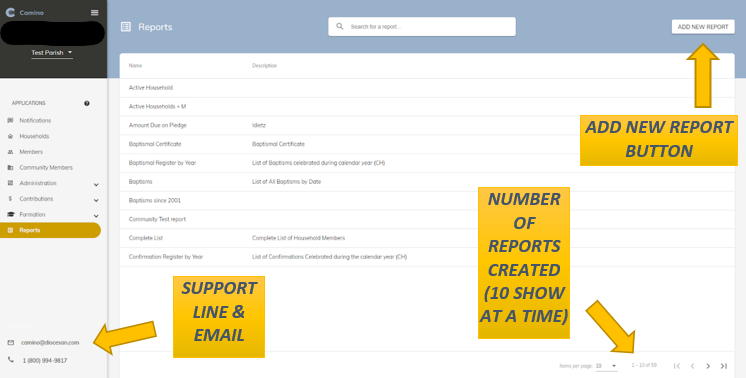
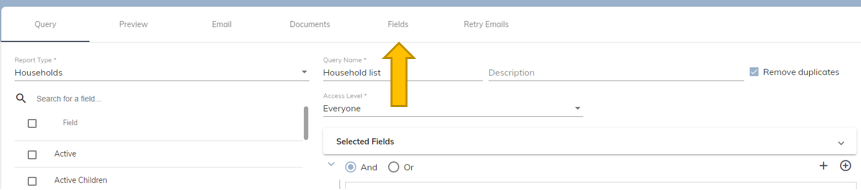
- Image of the Report Screen above
- This is the first screen you will see when clicking “Reports” in the menu
- The menu is on the left side of the screen and “Reports” is in yellow indicating that this is the page you are currently on
Creating a new report (Beginning of Reports Video)
- To create a new Report, click the ADD NEW REPORT button in the top right corner of the screen
- You will then be taken to this screen
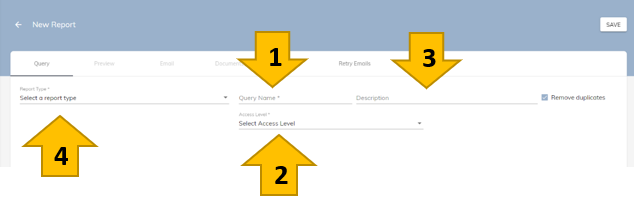
- First, give the report a name, the field is called “Query name” (Required)
- Select an access level for this report, this will determine who can see the report (Required)
- Give the report a description (Optional)
- Select the report type you would like to use (Required)
- After this is selected the screen will be populated with the rest of the tools necessary to create a report
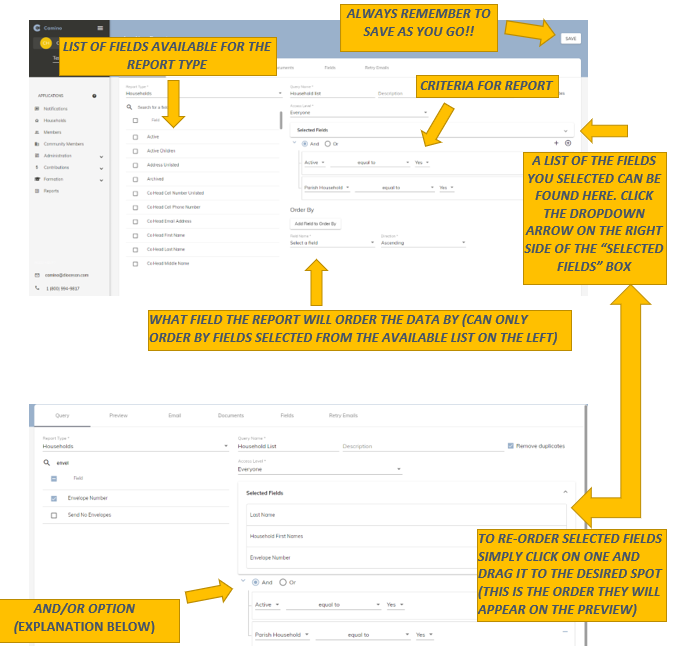
- As you can see in the screenshot above you have the option to search for a field
- Envelope Number was searched for and selected
- You can also see it in the Selected Fields dropdown list
- After completing all these steps, you can now preview your report
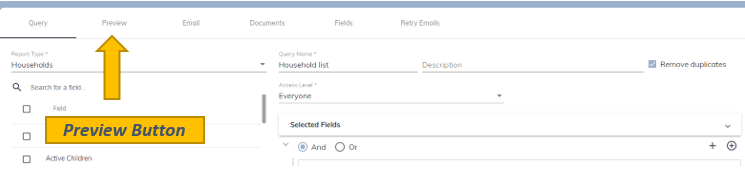
- Here is an example of what you will see after clicking preview
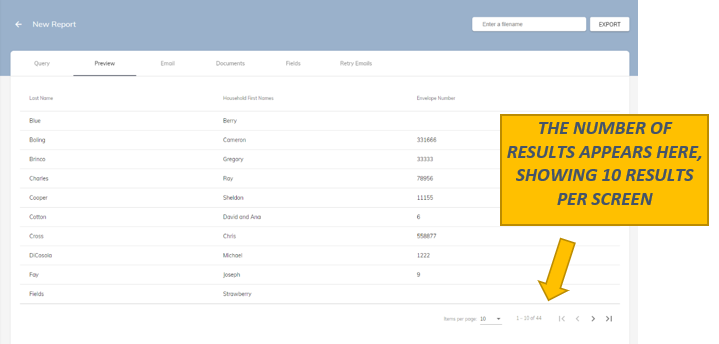
- This report pulls households that:
- Are active
- And have the Parish Household checkbox chosen
- Refer to the Criteria section in Screenshots 3 & 4
- For the AND/OR option AND is currently chosen
- If you changed it to OR you would get
- Households that are active
- OR have the Parish Household checkbox chosen
Export your Report (Minute 6:00 of Reports Video)
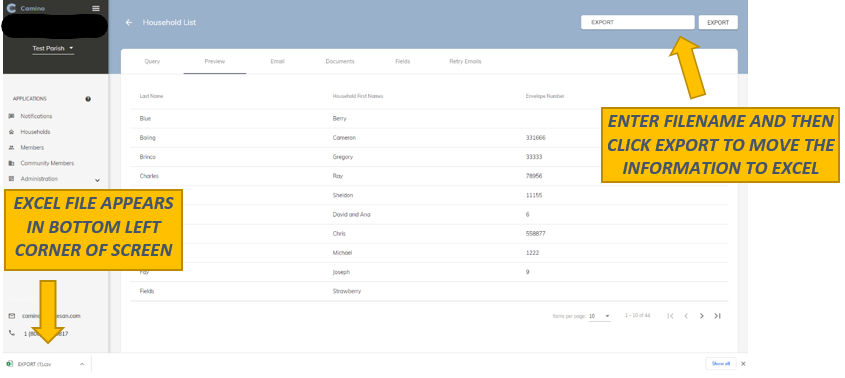
- Enter a name for the excel file in the top right corner
- Click export
- Different computers will have the excel file appear in different places. If you are having trouble finding the file, find your downloads folder. It will be the most recent file in that folder
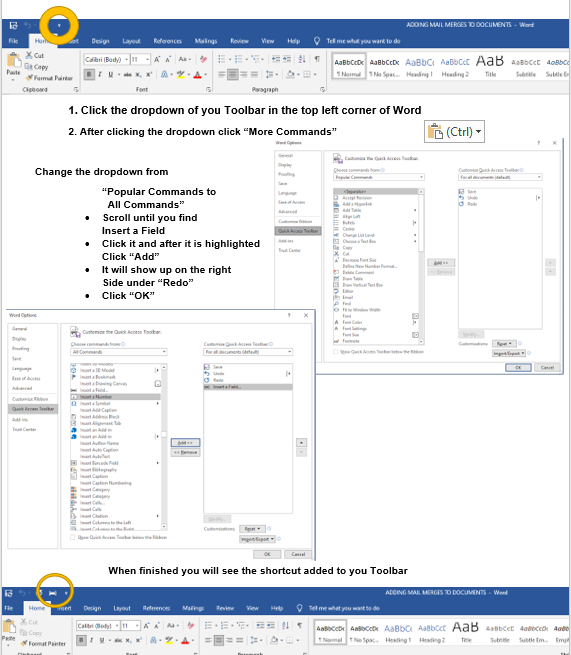
Adding the “Insert a Field” shortcut to your Microsoft Word (Minute 16:00 in Reports Video shows a different way to accomplish this)
- Click the dropdown of you Toolbar in the top left corner of Word
Adding Mail Merges To Documents (Minute 16:00 of Reports Video)
- A mail merge is a field in a word document that after the word document is uploaded to Camino and Generated, it will pull the field from Camino
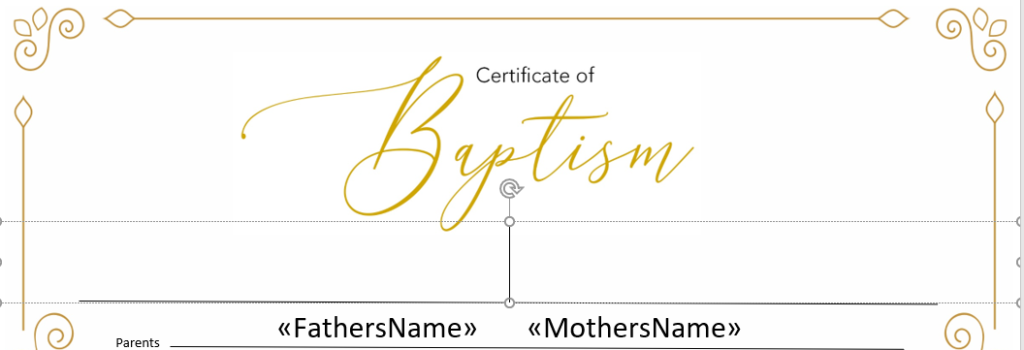
- A Baptism Certificate will be used for this example
- Baptism Name will be added into this certificate
- When this is done, if I need to create these certificates for a group for a certain date you would specify that baptism date in the criteria of the report and then generate this document
- It would produce certificates for each person who was baptized on that date
- The first step is to click the area in the document you want your mail merge inserted
- The cursor is in the middle of the box below the word Baptism
- The second step is to click the INSERT A FIELD button in the toolbar (If you do not have this already or do not know what this is refer to the section above entitled “Adding the “Insert a Field” shortcut to your Microsoft Word”
- After Clicking INSERT A FIELD you will see this:

- Change CATEGORY to MAIL MERGE
- Choose MERGEFIELD in the dropdown
- After choosing MergeField leave word as it is and go back to Camino
- Click into the report you will use
- Go to the FIELDS tab to locate the field we want as our Mail Merge
- Next, find the field you will use, click it once, it will become highlighted, then press CTRL+C

- Go back to word and in the Field Name section, paste the field (CTRL+V) into the space under Field Name
- Make sure there are no extra spaces in front of or after the field name
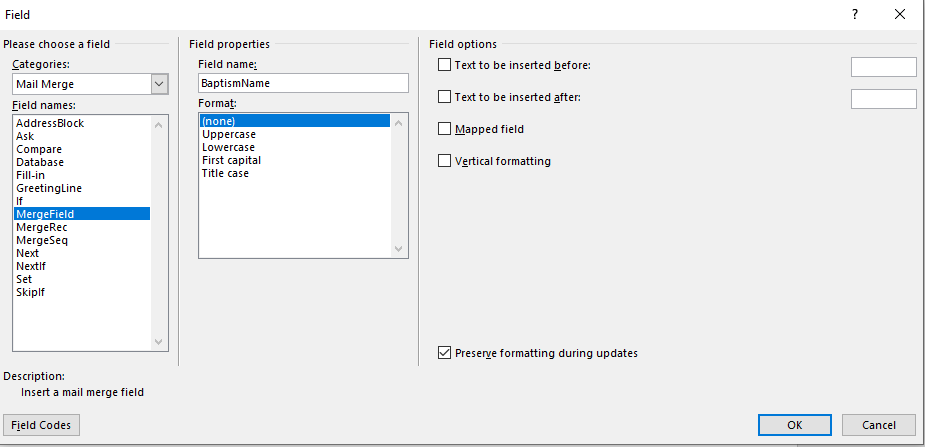
- Press OK, and the merged field will appear in your document

Adding Documents to Reports (Minute 21:00 of Reports Video)
- In this example I will add a sacramental certificate document to a sacramental report
- The report type for this sacramental report will be the “Members” Report Type
- When this document is added it will be available to all the reports that have the “Members” Report Type
- IMPORTANT: WORD DOCUMENT MUST BE SAVED AND CLOSED BEFORE BEING UPLOADED
- Go to the report that you wish to upload your document to
- After opening up the report you wish to upload the document to, you will click the documents tab shown below
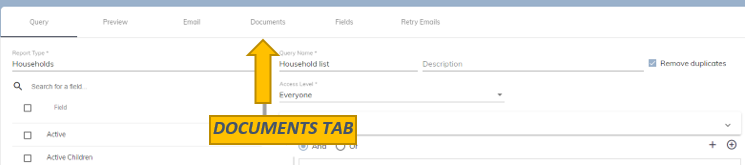
- After clicking the documents tab, you will see the screen below
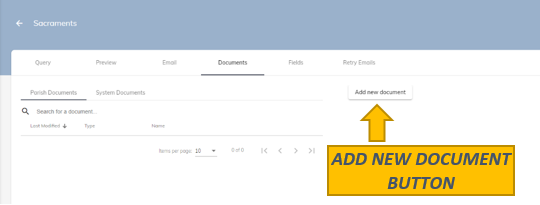
- Click the Add new document button
- Fill in the necessary fields
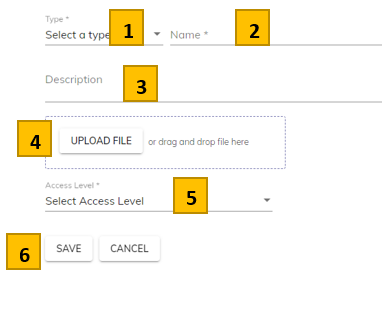
- Choose the document type (Preference, does not affect actual document) (Required)
- Give the document a name (Required)
- Give a description (Optional)
- Click the UPLOAD FILE button. Find the file you wish to upload
- Select the access level (Required)
- Click Save
- After clicking SAVE the document will appear in Camino like this:
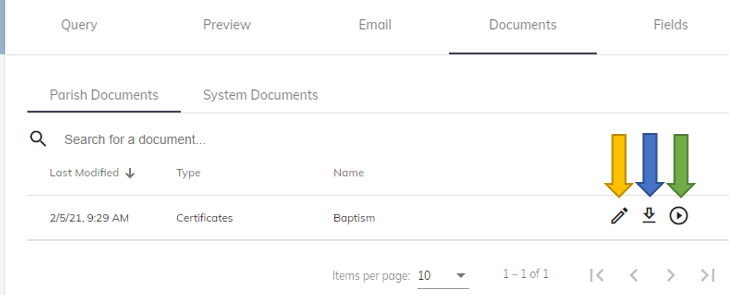
- There are three options after uploading the document
- The YELLOW arrow is the EDIT button, can change type, name, access level or replace document with updated version
- The BLUE arrow is the DOWNLOAD button, it will download the document that is currently in Camino and can be adjusted to your liking and then re-uploaded via the EDIT button
- The GREEN arrow is the GENERATE DOCUMENTS button, this will produce your mail merged document
Emailing out of Camino
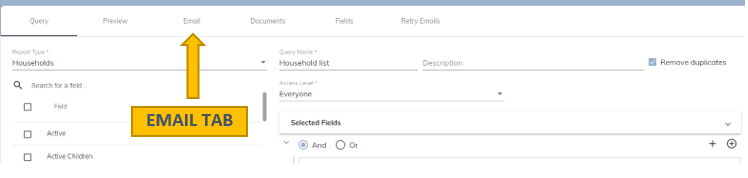
- To start, go to the report that has the information that you wish to email out
- Click the email tab
- If the screenshot below appears, ignore the next two bullet points
- If nothing appears, you do not have the capability to email out of Camino
- Contact Support to find out the necessary steps to set up email
You will see this screen
- (Required) – Choose a type
- (Required) – Give the email a name
- (Required) – Select an Access Level (Recommend choosing “Everyone”)
- (Optional) – Give the email a description
- (Required) – Choose which email address(es) to send to (Recommend choosing only one option)
- (Required) Give the email a subject
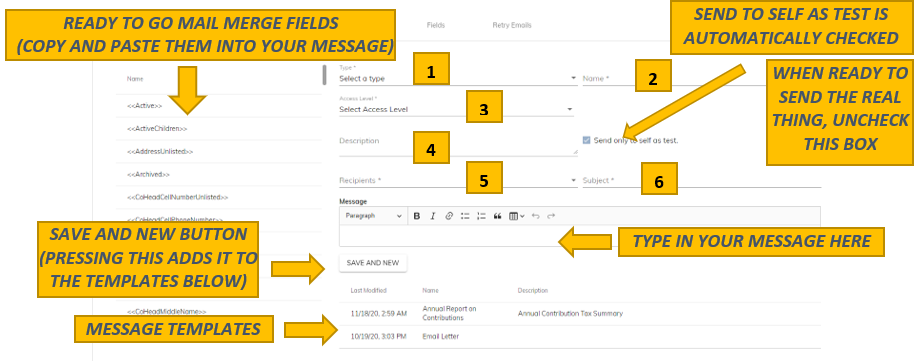
- To actually send a test or email out to a parishioner you must use a template
- So, once either you have created your new template or are using an old one a SEND EMAILS button will appear below the message box TYPE IN YOUR MESSAGE HERE. The SAVE AND NEW button will also be replaced by three buttons, UPDATE, DELETE, and CANCEL