WordPress Basics & Terminology
WordPress can be a little confusing when you first start out using it. Terms like ‘Block’ and ‘Admin Bar’ might be used, but may not be clearly defined or shown. This article will set to give you a grounding in the terms used with WordPress and provide a better understanding of what and where things are around here.
- Login Page – This URL will be provided when you initially receive your user account credentials. This is where you will login to edit the site.
- Backend – This term may be used a lot, but refers to the part of the site that is not seen or cannot be seen by the average user. Also, where the site is edited.
- Frontend – This is the antonym to Backend and refers to the site as seen from a user’s perspective. What is traditionally thought of as the site.
- Dashboard – The Dashboard
- Screen Options – Varies based on where you are in the Backend but will give you options to control items shown in that part of the backend. E.g. showing a different number of Posts in the All Posts list. Changing this will only affect your user account not others.
- Help – Also varies based on where you are in the Backend. It will give an explanation/description of where you are and helpful tips on how to use it.
- Admin Bar – Frontend/Backend – This is the bar at the top of the screen that has your organization’s name on the left and your username on the right.
- You can switch between the frontend and backend by clicking your organization name or if on the frontend, you can go to the menus by hovering over the organization’s name and clicking “Menus”.
- New+ – Create a new item
- Edit Page – Frontend only, you can edit a page or post quickly by clicking this option
- By hovering over your username, you can logout or edit profile (change account info and password)
- WordPress Menu – This is shown in the Backend and is the list of options on the left side that says Dashboard at the top and usually has Envira Gallery at the bottom, but will depend on what options are used.
- Page – Pages are used for content that does not change very often (static) and does not have much of an expiration date. E.g. About Us
- Post – Posts are used for content that is much more dynamic, meaning that it is constantly changing from week to week, or month to month. E.g. Parish Event
- Menu – This is the biggest part of navigation for your site. Depending on your design, you may have a couple menus, but the big one is usually the Dropdown menu where items are categorized under headings or other pages. Menus usually should not be changed too often. Menus can be found under Appearance > Menus in the backend, if you are an administrator for the site.
- Media (library) – The Media Library is the repository of all Media Files (e.g. Images, PDFs, etc.) on the site. Deleting an item here will delete it on all pages, posts, etc. that it appears on and there is no trash to restore it.
- Theme Settings – The Theme Settings is a place that houses certain options, based on the Site Design, that affect things in multiple places or the header and footer. E.g. The Organization’s address and contact information is usually stored here.
- Publish – This blue button in the top-right could also say Update or Schedule depending on certain settings. If a page/post is set to publish immediately in the Settings Sidebar, then it will say Publish and the page/post will become available after you publish it. If it says Update then it means that it is already published. If it says Schedule then the page/post has been set to publish in the future and clicking Schedule will make it go live at that particular time you have set.
Note: You may have to click this Blue button twice for it to take effect because of the pre-publish check.
Gutenberg Specific
- Settings Sidebar – This is shown in the Backend and will appear when editing a Post/Page or other screen with content added. In the newer versions of WordPress, it will show two tabs:
- The type of content structure you are using, e.g. Page, Post. which will show the settings for that type of structure. E.g. Categories for post, Page Attributes for Page.
- Block. If you have a specific block selected, the settings for that block will appear here.
- Cog
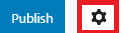 – This icon could be inverted (white icon and black background) and controls whether the Settings Sidebar is visible or hidden.
 - Options
 – This icon is to the right of the Cog and will give you different options like changing the view (turning Fullscreen mode on or off), switching the editor, Managing Reusable Blocks, Welcome Guide, and Copy All Gutenberg content from the page.
By Cody Armock