Camino
Camino Life – Parishioner View
Logging Into Camino Life
- Use the following link to get to the Camino Life log-in page: https://life.onecamino.com/public/home
- Enter the required information on your screen then press the Continue button
- A confirmation email containing a verification code will be sent to the email provided. IMPORTANT: DO NOT close this window at anytime. This will lock you out of your account and you will not be able to sign in. If you do get locked out in this way, use this phone number to contact support: 1 (800) 994-9817
- After entering your verification code, you can then set up your password. Make sure to write it down!
- Congrats! You’ve created a Camino Life account.
Camino Life Main Screen
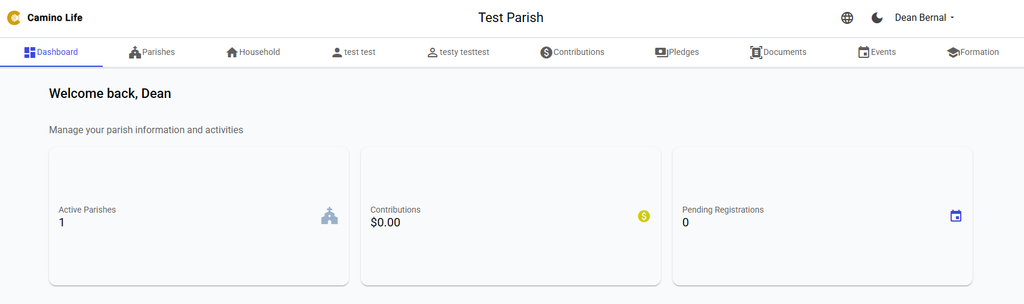
This will be your opening dashboard when you first sign into Camino Life. Listed at the top are the following from left to right:
- Parishes: This shows any parishes you are registered in on Camino Life.
- Household: This shows your household basic household information as it exists in the parish’s database.
- User Information: This shows your basic contact information as it exists in the parish’s database.
- Head/Co-Head Information: This shows the contact information of the Head/Co-Head of the household.
- Contribution: Shows a summary of your contributions that you have given to your parish and diocese as well as the ability to export your contributions on a spreadsheet.
- Pledges: This shows all the pledges that you have with your parish as well as allows you to create your own pledge.
- Documents: There may be some documents that your Parish has uploaded to your Camino Life account that you can download and print for yourself. This can include tax letters, welcome letters, etc.
- Events: You can see any events that you have registered for in this tab. If you are registered in a parish, you can register into any events that the Parish has created on Camino.
- Formation: You can see any faith formation classes that you have registered family members into. If you are registered in a parish, you can also register into any classes that the Parish has set up online registrations for through Camino.
Registering into a Parish
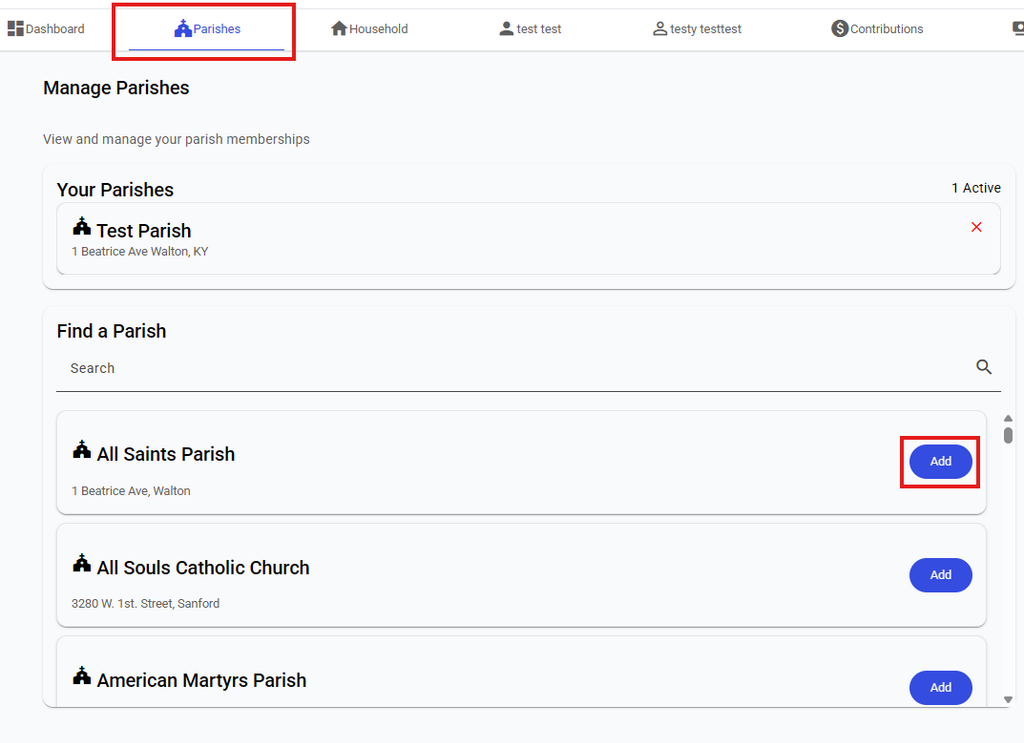
You may have already been provided a link by your parish to register directly for their parish on Camino. If not, you will need to navigate to the Parishes tab on Camino Life and search for the parish you want to register into. Once you find your parish, click on the Add button.
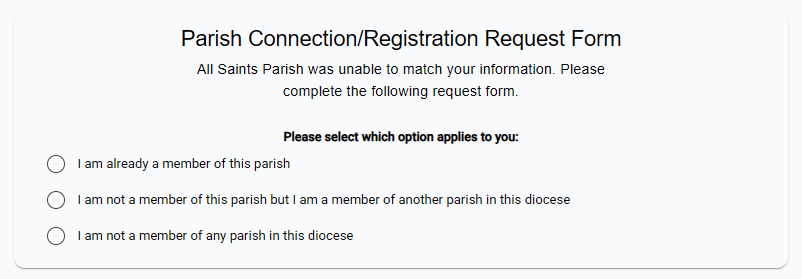
After clicking the Add button, you will be seeing this screen:
New Parishioner Registration Request
New parishioners are making Registration Requests for the parish will select “I am not a member of any parish in this diocese.”
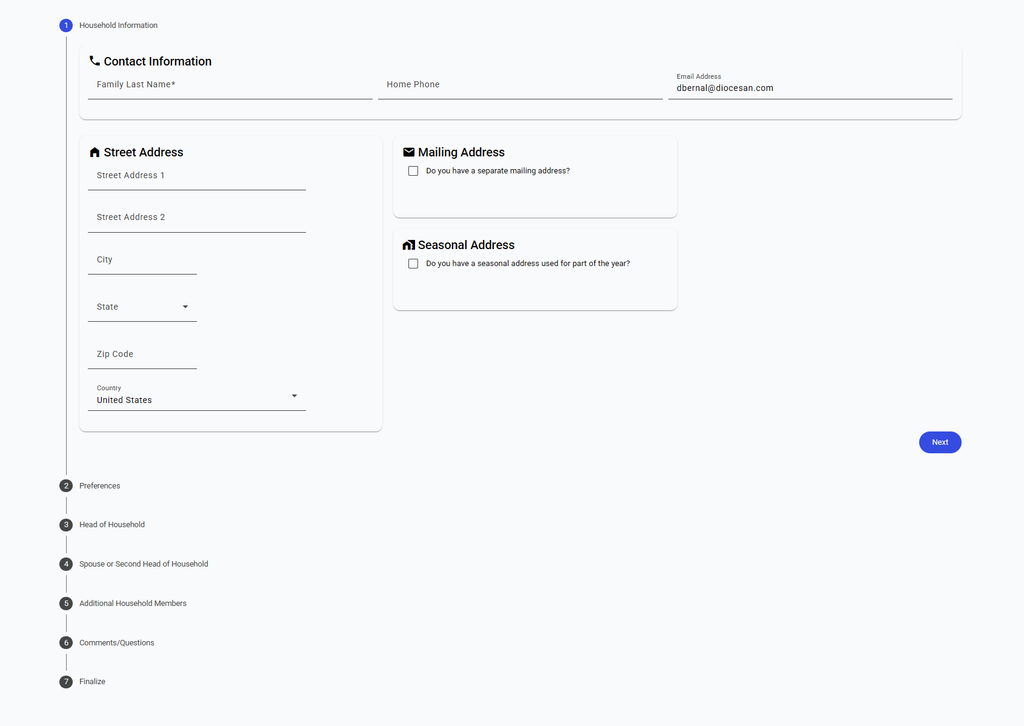
From here, you can start entering your information. This includes the following:
- Household Information
- Preferences (e.g., interest in Faith Formation, Online Giving, Volunteer opportunities, etc.)
- Individual member information
- Baptismal information
- Any final comments/questions
Once you are done, finalize your registration by clicking the Submit Registration button on Step 7 – Finalize.
Existing Parishioner Access Request – Within the Diocese
Parishioners that are already part of another parish in the diocese will create a Registration Request through the following steps:
- Choose the option “I am not a member of this parish but I am a member of another parish in this diocese.”
- Select another parish within the diocese of the parish you are registering for.
- Enter additional information of your family membership in this other parish to assist your current Parish to pull the correct information.
- Add any additional preferences you have.
- Click the Submit Request button.
Existing Parishioner Access Request – Within the Parish
Parishioners that are already a member of the parish but wish to see their information as it exists in the database will create an Access Request through the following steps:
- Choose the option “I am already a member of this parish.”
- Enter your name and email. You can also enter your phone number as well as an additional note.
- Click the Continue button.
You have now submitted a request to your parish! You now just need to wait for your parish to approve of your request. If they were to deny your request, look for any comments that the parish left behind on what may have caused them to deny your request!
Modifying Your Information
Right now, on Camino Life you can modify your household information as well as your contact information and your co-head’s contact information. You can not add any additional family members nor can you remove any family members on Camino Life.
Household Information
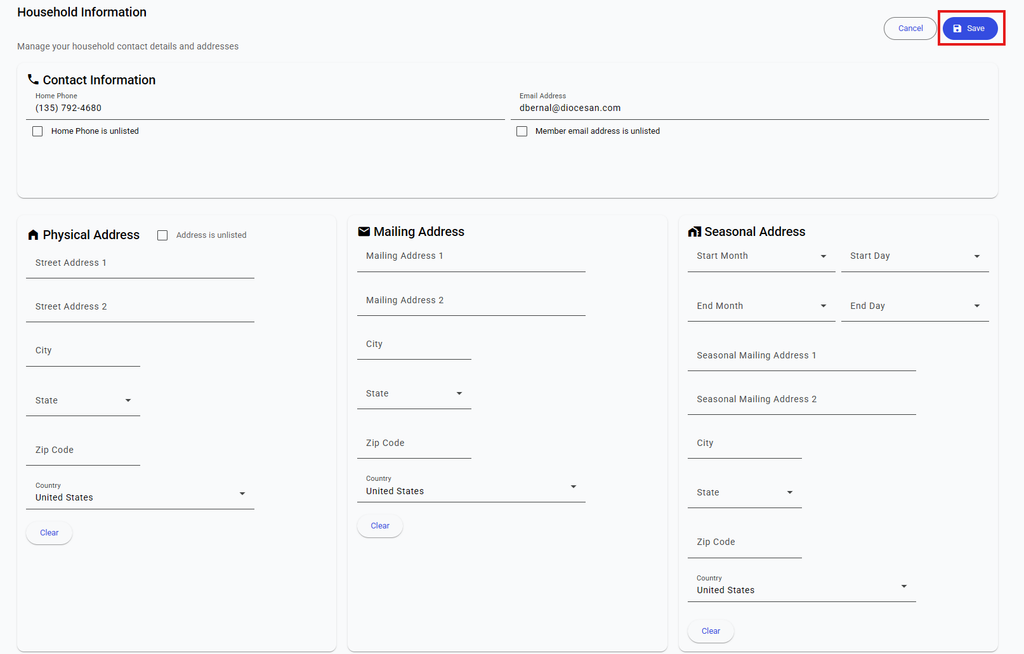
To modify your household information, click on the Household tab. From there, you can make any edits on your address and contact information. Any changes you make, press the Save button.
IMPORTANT: Changes are not automatically saved. Make sure to click on the Save button for any changes you make on this screen or household member screens.
Member Contact Information
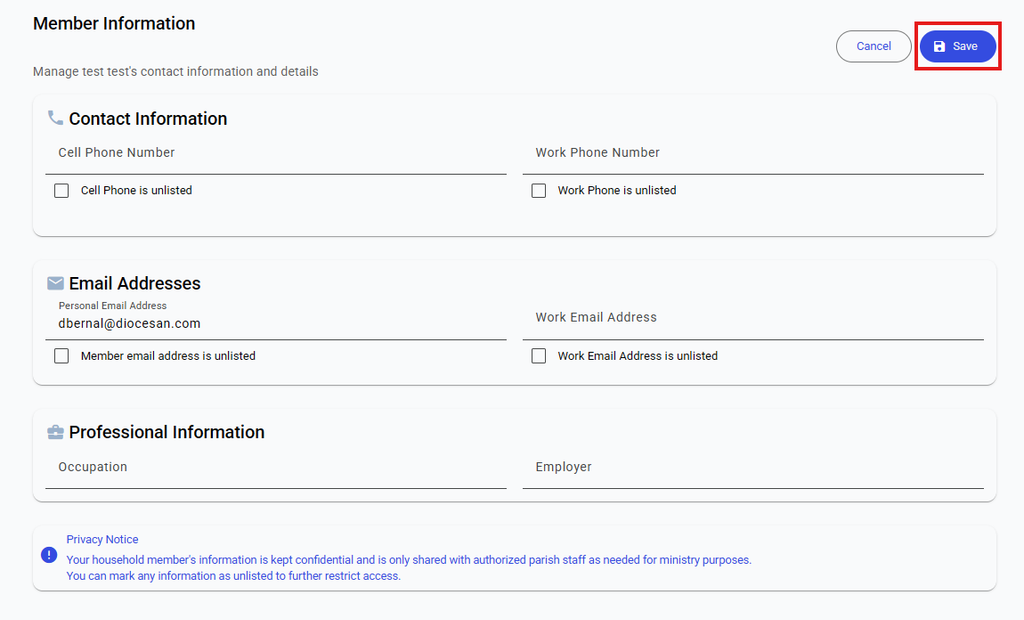
To modify your member contact information, click on your name at the top. From there, you can make any edits on your address and contact information. Any changes you make, press the Save button.
IMPORTANT: Changes are not automatically saved. Make sure to click on the Save button for any changes you make on this screen or household member screens.
Adding Pledges
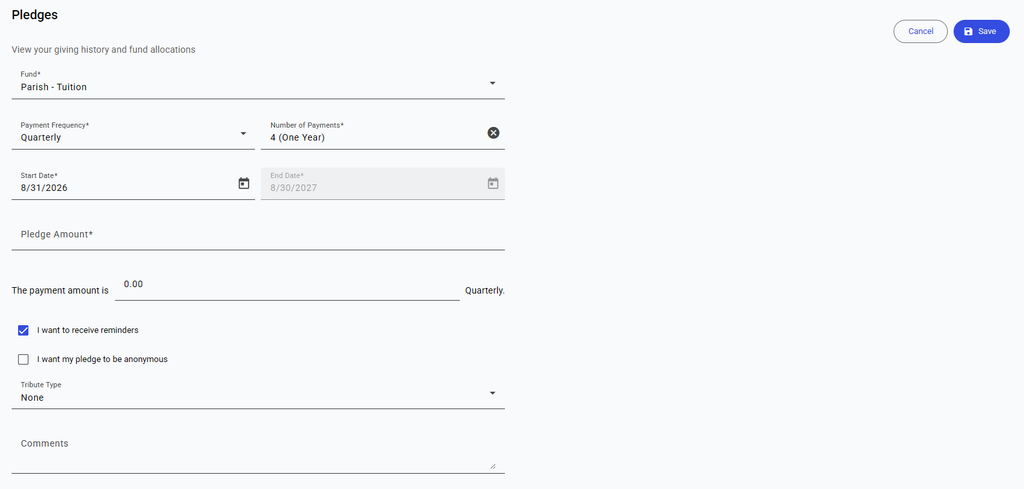
You can add pledges to your Camino Life profile by clicking on Pledges → Create Pledge. Complete the following steps to add a pledge to your profile:
- Select a fund the pledge is for.
- Select a payment frequency for this pledge.
- Select the number of payments you will make for this pledge.
- Enter the start date for this pledge. The end date is automatically filled in based on Payment Frequency and Number of Payments.
- Enter a pledge amount.
- Check if you want to receive reminders of pledge payments.
- Check if you want your pledge to be anonymous.
- Select a Tribute Type if there is a tribute the pledge is for.
- Make any comments for the pledge.
- Press the Save button in the top right.