To provide the best possible service and resolve your issue efficiently,
a support technician may need to view your computer screen exactly as you
see it. If needed, our support staff will ask you to click the Remote
Assistance button to launch the remote viewer and will guide you step by
step through the simple process of connecting.
You will find PROCEDURES under the Administration tab in the Main Menu
Grade Promotion
This function is used when students, for example, go from 3rd grade to 4th grade in Formation, regular schooling, or both
After clicking on Procedures in the Main Menu you will automatically be taken to the Grade Promotion tab
You will see two tabs below the Grade Promotion tab, Current Grade Promotion and Historical Grade Promotion
Current Grade Promotion is the tab you will use to do the grade promotion and Historical Grade Promotion will have records of all previous grade promotions. Sacrament Batch allows sacraments to entered in bulk to students in a particular class
To start, press the START GRADE PROMOTION PROCESS button
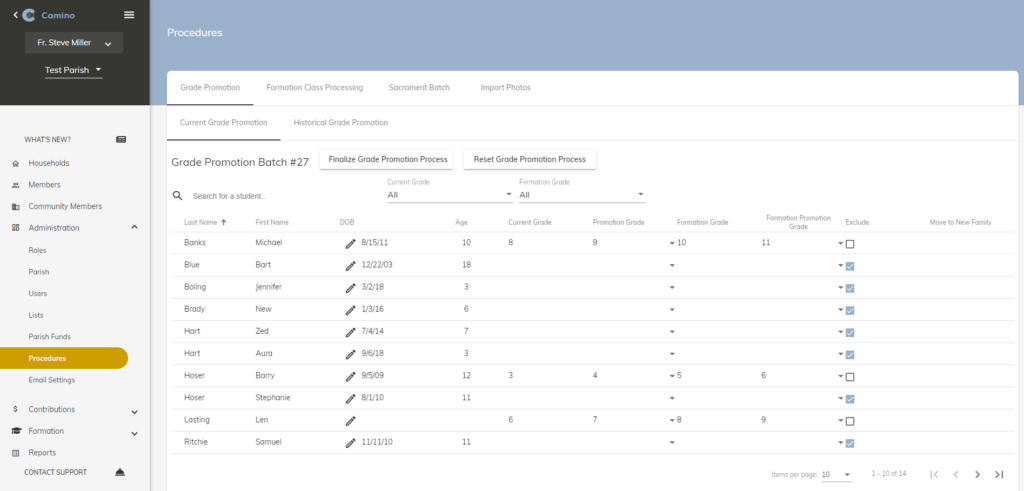
You will then see this screen
Screenshot 1
From here you can choose the students you will promote to the next grade level
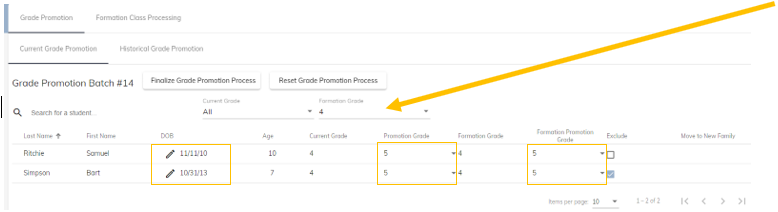
If I wanted to promote 4rd grade Formation students I would use the Formation Grade dropdown and select 4
Screenshot 2
You have the ability to exclude students if they will not be going to the next grade level. In the example above one student has been excluded from the grade promotion
Promotion Grade and Formation Promotion Grade can be adjusted to whatever they need to be
You will see multiple fields with student information. You can adjust Date of Birth of the student from here as well as the Promotion Grade (Yellow Boxes). For example, if a student is moving up a grade in Formation, but still in the same grade for regular schooling you would change the Formation Promotion Grade to reflect that
If you need to restart press RESET GRADE PROMOTION PROCESS and you will be taken back to the original screen under Grade Promotion
When you have the list of students you want included/excluded click the FINALIZE GRADE PROMOTION PROCESS button
Once you finalize the GRADE PROMOTION PROCESS you will be able to see it under Historical Grade Promotion. You will see a Batch Number, the date you finalized the promotion and the user that completed the process
Formation Class Processing
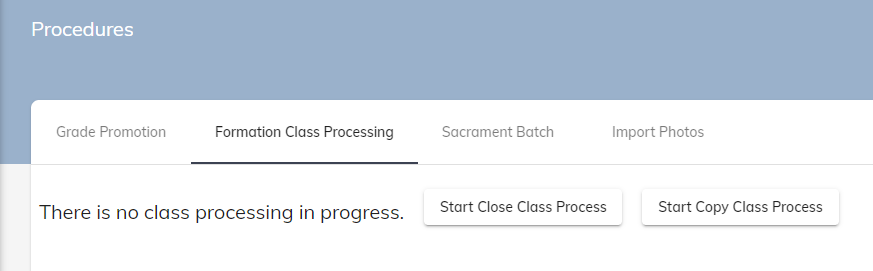
You have the option to “Start Close Class Process” or to “Start Copy Class Process”
Screenshot 3
It is recommended that you use the “Start Copy Class Process” first, this will bring over the same schedule frequency, location, room number, cost, start time, end time, and notes that were in the class being copied
After clicking the “Start Copy Class Process” you will select the Class Period that you wish to copy. Then click the “Start copy process with the selected class period” button
A list of the classes in that class period you selected will appear. If you do not wish to bring some classes over, simply uncheck the Include checkbox
When are ready to proceed press “Finalize Copy Class Process”
Give a new Start and End Date for the classes and press SAVE
You have copied your classes successfully
Once you have copied your class you can now inactivate or close your classes that are now over
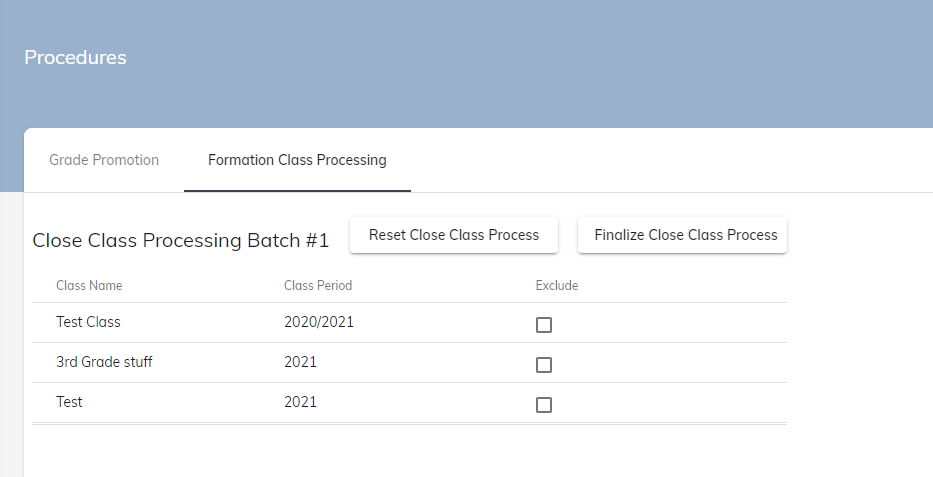
Press the “Start Close Class Process” button
Screenshot 4
If you do not see the class you wish to close, hover your cursor over the class names and scroll. You should then be able to find it
Every class is automatically chosen for the closing out process
To exclude a class, simply click the checkbox for the class under the “Exclude” section
When you are ready to close the class or classes, press the FINALIZE CLOSE CLASS PROCESS
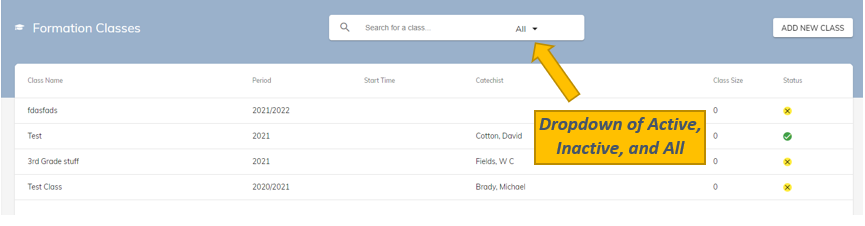
To check that you did everything right, go to the Formation tab and select classes. On the right side of the search bar, you will see “Active”. Click that dropdown and choose either “All” or “Inactive” and you will see the class or classes that you closed out
Screenshot 5
Sacrament Batch
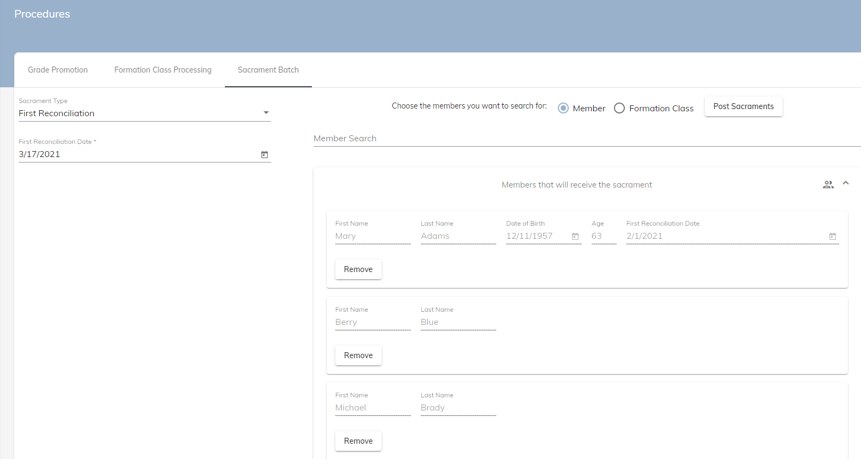
You can post sacraments in bulk to the students in a formation class or use the member search function
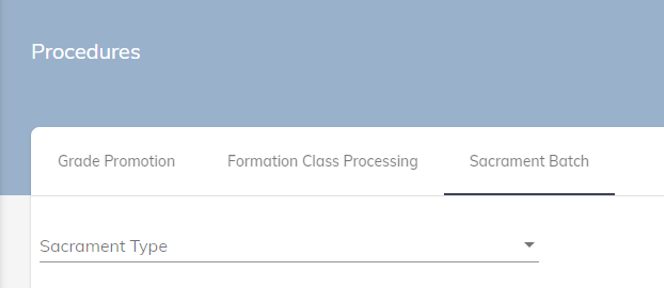
After clicking the Sacrament Batch tab, you will see this screen
Screenshot 6
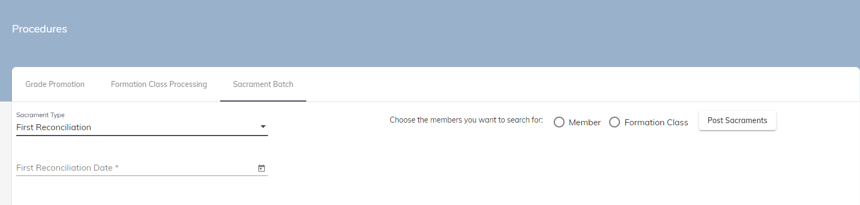
Click the SACRAMENT TYPE dropdown and choose the sacrament you are posting
Screenshot 7
Enter the date of the sacrament on the left. Some sacraments have more information that will need to be filled in. Then on the right side choose the Member or Formation Class option
Depending on which option you chose, you will search for member by name or by class name
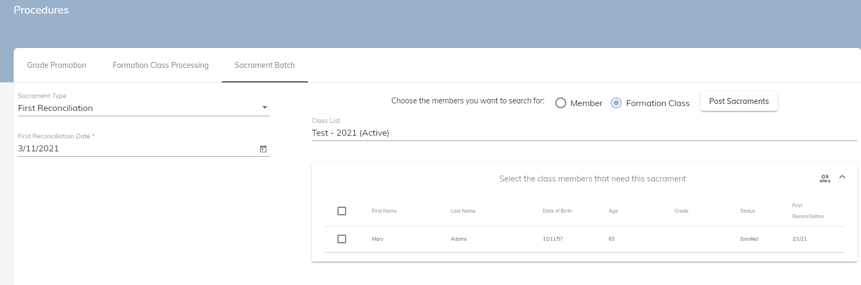
To search by class
Screenshot 8
Click where it says CLASS LIST and search for the class you are assigning the sacrament to. Choose the class from the dropdown list
To choose all of the students at once click the checkbox to the left of the field “First Name” or you can choose the students individually with the checkbox that is on the left side of the individual profile
Double check list to ensure the correct students have been selected/deselected
Notice that if a date has already been entered for this member, it is displayed so that you can decide if it should be overwritten
Once your information is verified, click POST SACRAMENTS
To search by member
Screenshot 9
Click into where it says Member Search. This is the search bar you will use to find your students
Continue using the search bar to compile the list of members
Notice that if a date has already been entered for this member, it is displayed so that you can decide if it should be overwritten
When you are finished click the POST SACRAMENTS button and the member profiles will be updated
Batch Tags
This feature allows for tags to be added and removed in bulk
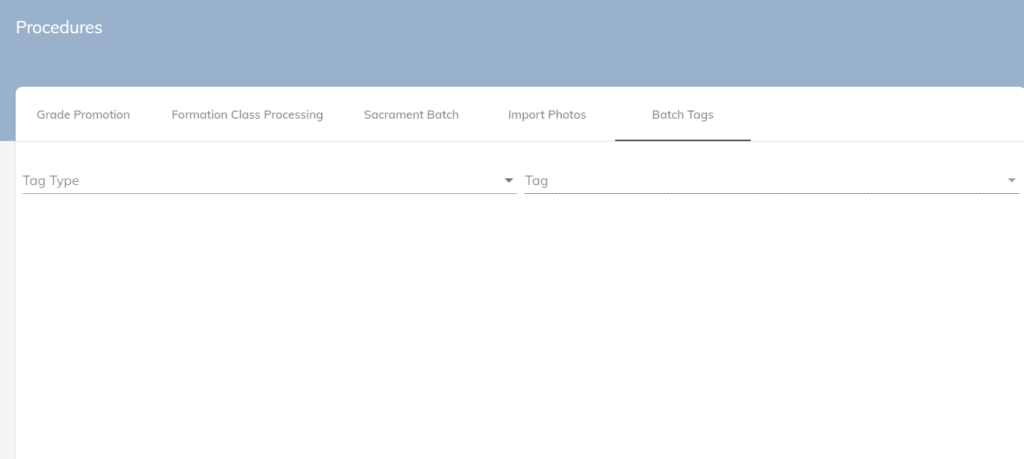
After clicking the Batch Tags tab, the following screen will appear
If batch tags cannot be found under PROCEDURES, the right of Batch Tags needs to be added to your role by the System Administrator
First select TAG TYPE
Households, Members, or Community Members
After selecting your TAG TYPE, select the TAG that will be added or removed
If the desired tag is not in the current list, that will be added under ADMINSTRATION > LISTS. After that is added, return to ADMINISRATION > PROCEDURES > BATCH TAGS
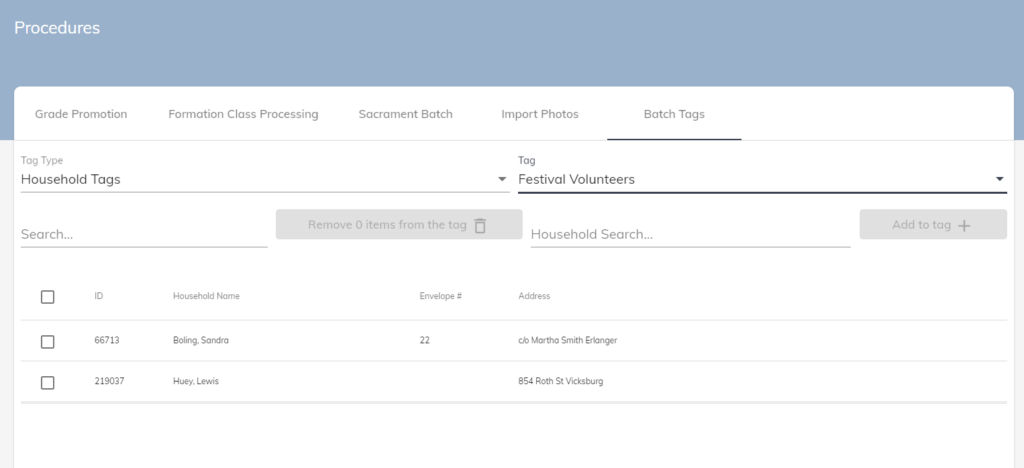
Once you have selected a TAG, the following will appear
Any Households, Members, or Community Members that currently have the tag will appear in a list below
On the left side is where you will remove the tags, and the right side is where you will add tags
Utilize the search bar to find the desired Households, Members, or Community Members
There is no SAVE button here, once you have added or removed the tag, the changes will be automatically saved